Wednesday, December 31, 2008

Goodbye to 2008 with a Fabric Journal

In the hurry to get rid of this year, which truly was a bad one for so many people, it helps to remember that many good things happened, too.
I am not going to bore you with a "year in review". That's what that Archives list is on the side bar for! You may choose your own.
Being human, though, we tend to think the most immediate event is how things are over-all.
You can help change that by keeping a journal of some kind. It will amaze you to look through it and be reminded of what really happened.
This is my journal:


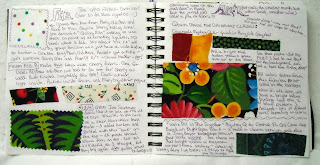
The large spiral binding of a sketch book allows for the added thickness of the fabric swatches. The glue stick is kept close at hand along with the purple pen!

Your journal does not have to be fancy and artistic, though it may end up being a place for you to try out a few things. It does not have to contain all your deepest secrets (you already did that when you got the one with the little lock for Christmas...about 20--30--40--50 years ago!).
This book is just for you.
It may help to select a theme for it (which, of course, you may change at will).
My journal is about what I'm doing with fabric (mostly).
Let's take a look at 2008...don't worry, not all the pages!

This book just runs from one year to the next. Look! It's the only photo in this book, to celebrate Patchwork Pie's beginning.

My goodness, it's the end of 2007 and beginning of 2008 right together. In the words of Yogi Berra, it's deja-vu all over again!
There's the bag I made for my sister, and trimmings from my sweatshirt jacket.
I don't draw pictures or show photos of any projects...this journal is just about the fabric.

When one moth ends, the next begins...April made the top of this page, but August starts in the middle several pages over.

I was looking at this and wondering: what happened to March? Then I found the note at the top of the right hand page, "Obviously some of this was done in March but the journal was under a pile of fabric!"
Most of the time I just glue in the fabric bits, and then write around them.

A reminder of the lovely "green bags," followed by samples of the fabrics in the "invisible quilt", which is why you only see half the page...I sketched a little diagram of the block!

All this fabric is really cheerful!
Now I am feeling pretty good about all the things I've done this year.
Rushing from one project to the next (and often leaving a trail of UFOs behind) can leave us thinking we didn't get much accomplished...as usual, we just need some perspective.
Like a good friend, a journal can remind us what the truth is, and make us feel so much better!

A blog is another kind of journal, and I surely do enjoy sharing this Patchwork Pie with you!
May your 2009 be filled with fun & fabric...I'll see you back here "next year" with some tales of the BGPC's first day of 2009.

Saturday, December 20, 2008

Last Minute Gifts

The Last Minute has officially arrived!
So, in honor of Time Running Out Yet Again, and for those of us who live by the motto "If it weren't for the Last Minute, nothing would get done!" I'd like to offer this link to one of my lists from last year, Fast Gift Items. There are ten items on the list, my favorite being the apron made from a bath towel.

Cherry-Cherry likes to see a picture in every post, so here is another Christmas quilt. I sold it this year at QuiltFest...I wonder whose house it is in now? And did they use it for Instant Decorating? Or maybe it was a gift!

I'll be travelling for the next week...and you know my track record of blogging-on-the-road has not been so great...but we'll see what I can do. I'm sure there will be some adventures to tell about.
I am hoping to shop at St. Theresa's Textile Trove again! (It was so nice of them to move closer to my Dad's house).

So until then, I wish you a Merry Christmas, which is what I celebrate, and a joyous time for you and your loved ones, whoever and wherever you are!

Holiday Decorating Advice

With just a few days until Christmas, I believe the Last Minute is just about here.
I have one day left to pile everything in my van and head north to Ohio.
You may be having company on the way, as I had last week when the BGPC came over to my house.
For those of us who have better things to do than housekeeping, here is what to do with your holiday quilts:
Stack all that assorted stuff on a table, then toss a quilt over it! By placing the quilt "on-point" it will cover an even larger area! (this is Tennessee Waltz, a sample from back when I taught Quilt In A Day at a Big Box Store! Get the instructions free online at:
http://http//www.hgtv.com/crafting/tennessee-waltz-wall-quilt/index.html )


Put all those un-sent cards and gift wrap remnants into your desk, then distract everyone with a little quilt! They'll all be talking about how you made this Snippets wreath, and no one will try to peek inside while you're out in the kitchen getting coffee.


Once you've tossed a few quilts around, the whole room looks decorated. Even if that table hasn't been dusted in months, your secret is safe under a table runner...they're not just for dining rooms anymore!
You may also notice that the red/ green color scheme is so automatically recognised as "holiday" and "cheerful", your guests will never think of it as clashing with the pink & blue upholstery & rug!

Of course, this will work with a collection of blue & white quilts for Hanukah, or other colors for any holiday you are celebrating when family & neighbors are likely to be dropping in.

That's why my #1 advice in choosing fabric for a class (especially a mystery quilt!) is to select fabrics to go with the holiday of your choice. That way you can start your own collection of Instant Decorators....a real time saving when that Last Minute arrives!

Thursday, December 18, 2008

Another Invisible Quilt

I would really love to show you the quilt I am currently working on, but it can't be seen.
It's another Mystery Quilt (for Quilting By the Bay's retreat at the end of January, in Panama City, FL...you may have seen this shop in the latest Quilt Sampler magazine).

Although I love designing the quilts and writing these classes, it is frustrating to work so hard and so long on something I can't be sharing with you!
But here...take a peek:


I think this is safe...there is no way to guess the block from this shot!

The challenge (for me) in doing a Mystery Quilt class is that I need to make a sample to try out the fabric requirements and construction steps.But I have (almost) never in my life made a quilt exactly the way the original pattern was set out, and I find it totally impossible not to mess with even my own patterns!
That's one reason I am so thankful for my Beta tester supreme, Cherry-Cherry...although she often has the same problem!
However, this does mean that when the class is held, I often have several examples of what can be done with the block/ pattern the students have just learned, and I think that's wonderful. You know, if you have done any mystery quilts, that the biggest concern is not knowing what it will look like. Sometimes the class projects are less than exciting...but it is exciting to see some ideas right away of what can be accomplished with a bit of planning, especially color control!

Right now the Big Thing is those "jellyrolls" of 2.5" strips, and no matter what I teach, that seems to be the first question: can I use a jellyroll for this?
This Mystery Quilt is designed to use ALL 2.5" strips! (OK, not when you get out to the borders...)
I can hardly wait to see what wonderful quilts we'll be making during the Quilter's Paradise retreat . That is the best part of going to class! And at a retreat you get to see a lot of quilts, as there will be several teachers besides all the students. Or is that "retreaters"?

I am sorry this quilt needs to be invisble for awhile longer, but I promise to reveal it ASAP. The retreat version is fairly straight-forward, but I like my own version so much I am going to publish it as a separate pattern!
It's name will be "Roxanne's Honeymoon"...and that, my friends, is a story that will have to wait for another day!

Wednesday, December 17, 2008

Strips Gone Wild

Although I have never purchased a "jelly roll", I seem to have accumulated a huge number of 2.5" strips. And as my latest project is designing a mystery quilt using all 2.5" strips (because lots of people do have the jellyrolls and want to use them!), I found my shoebox had finally reached it's storage limit.
The W-Big Box Store had plastic shoeboxes on sale 2 for $2, so how could I resist?
Convenient access to a shoebox: cut the sides on the lid at the mid-point, then place a rubber band around there to hold the top on...it's like a picnic basket!

After living together all these years, the strips had to be divided into Lights and Darks, a system where any mediums just have to fend for themselves!
Actually, I think of the Lights as backgrounds, and that's how I made the decision which box received which strips.
You sharp-eyed readers are seeing the backs of two fabrics that seem to be in the wrong box!
No labels needed with see-through boxes!
Though when the day comes that all the strips go into plastic, I guess I'll have to show the sizes.
But for now, the rest of the strips are still in shoeboxes with my super rubber-band hinge.
This may be the reason the plastic containers will be replaced, though...no instant access!
However, for the time being, while there is still room on this set of shelves, the various boxes can all hang out together.
When boxes are labelled, there's no reason to keep them in any order...they get stacked as they're used and returned. And no...this is not ALL the strip containers!
Although there is a box here marked "Red Strips", it does not have every red strip! I believe that's connected to a project that goes back at least 14 years.
Some ideas seem to need a lot of time for aging.
Which reminds me......
Time For Some Whine!
Once again a company has "improved" something "for your convenience". That usually turns out to be bad news.
Picassa, the Google photo managing system I use, (OK, it's free...) has upgraded to version 3, which has a bunch of features I won't use, loads slowly, and has changed one of my favorite manipulations to be almost useless.
I loved the ability to crop pictures manually, but now there are just standard sizes. Geesh, I thought the whole point of cropping was to take out the parts you don't want!
Well, it does do a lot of other cool things, and the price is right, so why am I complaining?
(because I like to, that's why!!!)
Coming next: The Invisible Quilt!

Friday, December 12, 2008

Reverse Sewing, or Pickin' but not Grinnin'

You may call it reverse sewing. Or how about the Frog Song ("Rippit, rippit...")?
I'm sure we've all used colorful language of some sort when it comes to taking out the stitching!
There was once a time, long ago, when quilters used to kid each other:
"I messed this up. Do you have a seam ripper?"
"Oh, no, I don't ever need one!"
Ha, ha, ha.... we became older and wiser, and finally all had seam rippers right at hand.

Here we see a nasty job in progress

I truly advise getting a good seam ripper, not the 59 cent Big Box Special. Use the coupon if you must, but get a good ripper. You will see my two favorites in this post. They are both made by Clover.

Features of a Good Seam Ripper

1. A very long slender "finger" to slide between those tiny machine stitches.
2. A little ball/ bead on the shorter part.
3. A very sharp blade! Why, yes....you can cut yourself with a seam ripper! And thank you for asking!
4. A nice handle to hang on to, or balance in the palm of your hand.
I might also add that it is nice to get one with a cover for the sharp end. You know what I mean if you've ever been digging around in your supplies.....ouch!

How to Rip

Method # 1:
On the bobbin side, slip the long finger between every 3 or 4 stiches and cut them. When you get to the end of the seam or section, turn it over and pull off the top thread...it will come away easily. Separate the pieces of fabric.

Method # 2: (this is why that little bead is on the short finger...) At the start of the seam, pick out a few stitches to open the end. Slip the ripper onto the seam, between the layers. The long finger goes on top, and the beaded part below. Gently hold the fabric layers together with your thumb and index finger on either side of the ripper at the blade (ripper inside fabrics, fingers outside!).
The reason for holding the fabric that way is so you can immediately feel if the ripper is not cutting OR if it is going to poke through the fabric.
If the ripper won't move with gentle force, it is probably clogged up with cut threads.

My favorite ripper...really sharp!

This ripper is really sharp, and comes with a cover. I have two, and I also like to give them as gifts. When you need to rip, a good ripper is much less agrivating.

The new issue of Quilting Home magazine, from that crazy quilter Mark Lipinski, has an article about ripping. He likes to use a rotary cutter. Scary to me, but whatever works for you is the best way to do anything!

I once used the seam ripper that has a light attached. I thought it was heavy & unnecessary.
Then again, I am "at that age" when my terribly near-sighted eyes are changing for the better (but when my optometrist told me that, I said I will never live long enough to not need glasses!).
So I occaisionally take my glasses off for close work, like 3" from my nose.

The amazing thing was that I could even find the camera to take this picture!

It is soooo easy to forget you have a ripper in your hand...this photo makes me think of Gary Larsen's The Far Side cartoon. One of his favorite captions was "Trouble brewing?"
I am happy to report I was very careful today!

The ripping is done now (a series of sashing pieces that had to be changed....at least it wasn't an actual mistake!) and it's time to move on.

Tuesday, December 9, 2008

Happy Birthday, Mouse!

Today is the birthday of the computer mouse...and where would we be without it?
A blogger's essentials: coffee, keyboard, notebook & mouse!


It was 1968 when Douglas Engelbart showed off his "X-Y position indicator for a display system".
Yes, even our wildest dreams (and they were pretty wild back in '68!) we did not imagine that the world would be connected...and on such a personal level!...as we are today, through our computers and the Internet/ World Wide Web.


As you may see, my own mouse has a wire "tail", which was the origin of the nickname.
If you have a wireless mouse, never fear...it's just the version from the nursery rhyme of "Three Blind Mice"!


Now for the "quilty stuff"!
Please admire the notebook cover above, which features parachuting cats and an adorable porcelain button. This was made by a dear friend, who shall now be called Mrs. Starbucks (yes, it must be plural, as she is prone to have more than one per day!).
Inside is a standard composition book, available everywhere notebook paper is sold.
You can make your own pattern to fit that or any other notebook. Mrs. Starbucks did!

Open the book flat and lay it on paper. Trace around the book, then put it aside.
Add a curved flap shape (approx. 6") at one short end, and about 4" extra at the othe end. That will be folded over to make a pocket. Now add about 1" extra all the way around.
You also need a piece 3" wide x the heigth of the pattern (approx. 10.5" in this case).....(you could make the flap as a separate pattern piece, too, to add a different fabric as an accent).


Now have fun making a quilted and/or embellished cover. Use batting if you want, but this cover was done with denim and didn't need the extra layer. Chose a nice fabric for the backing, and you won't need to add another for the lining.
Layer your cover wrong sides together with fabric for the inside (if you need a lining), then cut out the pattern shapes.

Bind the long edges of the 3" wide piece, then pin it to the inside about 4" in from where you added the flap to the pattern. It will hold the back cover of the book in place when you're done.
At the other end, fold in and pin the extra 4" added...this is the pocket that holds the front cover of the notebook.


Add a binding all the way around, catching the ends of the 3" piece and pocket as you go.
Finish up with a cute button to hold a ribbon or other tie tie in place, or make a different closure.

I know you are creative, and will think of all sorts of things to do with this...add some sort of holder for a pen, maybe a label to ID the owner....what else? Try not to make so many lumps that the you can't write in the notebook!


Thank you, Ms. Starbucks! I use this notebook all the time, and will be replacing it when it's filled up....because I have a great notebook cover now.

Simple items make a great "canvas" for trying out new ideas, especially those you see in a magazine. Maybe you'll make a few notebook covers for gifts, too!

Monday, December 8, 2008

The Bag Parade

Being on a quilt retreat is not the best time for a complicated project, especially late in the year.
But it is an excellent time to work on those need-to-be-done gift items.
I decided to make "green" shopping (grocery) bags for my family members....that seems to be all the rage, and such a good idea, too! Not only does it reduce the number of plastic and paper bags to be stored (or, worse yet, thrown away!) but a it can use up remnants, odd thread, and other things from your sewing room.

OK, it can also be another excuse to go buy fabric!
I confess, I went to that Big Box Store and purchased some home dec. fabric, because I actually wanted the first bags I give to be the color green. But it is fun to bring a unique bag to the grocery, and it will carry about as much as you want....without breaking or cutting off the circulation in your hand, wrist or fingers!
A couple of bags I made were tote bag style:

It's shiny! It's home-dec!
It's definitely made to be used by someone who doesn't care!

There's nothing like free fabric, and you may know how quilt guilds are often the recipients of "fabric" (content & origin unknown). Due to my pack-rat nature, I try hard to avoid these free-for-alls, but that means limiting myself to taking only a few pieces.
Now I can justify this because I have used it and am making a gift. In fact, there is another one just like it! But I won't expose you to both of them.

30% off made this an excellent Big Box Store buy!

I liked this fabric so much I went back and bought more.

These smaller bags are based on measurments slightly smaller than a regular brown paper grocery sack. There is a concern about having so much in one bag that it's too much to carry.
The bottoms are about 6" wide, so they'll hold some boxes and packaged items very nicely.
Up-side down & inside out

Taking a tip from Pat's AnotherPatch gift bag, I tried out the French seam bottom, and liked it. Now, Pat's bag is a lovely item, but what I'm making is intended purely to be used & abused. It's good to consider your purpose when sewing....some things are worth the extra time, and some are just made to be functional.
That is, of course, why we need great fabric!

It's pretty, but what is that smell???

I also wanted to make some big bags, because sometimes you buy a package of paper towels or TP and need a larger size. Again, you have to be careful about the weight.
This stuff was on a really deep sale, and I already had the tealish fabric for the handles.
My mistake? It's like Herculon or something, an upholstry fabric with a rubbery backing. It was not bad to sew, but it has a definite odor! I am hoping a good airing, maybe a trip through the dryer with a scented softening sheet?....I will have to do something before giving it to an unsuspecting relative!
Nobody wants to hear that their sister-in-law said your gift "stinks"!


I meant to do it that way!

These larger bags have handles that go around the bottom...my favorite style, as it gives support for whatever ends up inside. Guess I didn't figure the right amount of fabric ....no, wait.... I meant to do it this way! It's a decorative effect!

This bag also has a twin...I saved the best for last!

This fabric is so pretty, I was sorry to be making a simple bag instead of a really nice tote with lining, pockets, etc., etc. Everyone at the retreat wanted to find some just like it. And I did like it so much, I cut it and turned one half the other way so both sides would look right. That's where a directional fabric can trip you up! Sometimes an extra seam is worth the trouble.


Maybe having a beautiful bag will make going to the grocery a more pleasant task. I really have to admit, it is fun to take my fabric bags and have the cashiers ooh & ah over them. They are much better than the "green" bags for sale inside the grocery.

I hope my family members enjoy them, too.....you never know about these things!


I enjoy making bags as I go along, not using an actual pattern. Because the sewing is not too demanding or prone to be examined closely, I can make some changes. I'm thinking about trying seams around the bottom (actually the fabric just folded and stitched) and maybe on the side edges to give the bags more structure.

Let me know if you'd like some measurements and a quick tutorial...I'll make another bag and take pictures along the way, since I finally found my camera!

Sunday, December 7, 2008

The Last Retreat

I am finished retreating...for this year, anyway!
Three quilt retreats in 2 months is just too much, but how could I have missed any of them?
I had to go with my guild, even though it was rush back from the Houston show (besides the minor point that I was the chairman...). And then the state-wide guild's retreat meant I would see people I rarely have a chance to talk with (and find out what all those other guilds are doing!).

So now I am home, exhausted from the best retreat of all, at the Beach House with the BGPC: four days, right on the ocean (with the waves to put us to sleep each night), loads of fabric, food & fun!

My retreat buddy: the blue & yellow scrap quilt. I use this as an example in my Scrap Basket lecture, and was so suprised once when a lady offered to buy it...I was speechless! A very rare event for me!

Although I left my camera at home (not to mention my cutting board and nightgown!) (never fear, there was a T-shirt & knit pants to stand in as PJs), I do have a few pictures to share in the next few days.

Tomorrow: The Bag Parade!

Tuesday, December 2, 2008

Sporadic at best...

Dear Readers, I have been a less than ideal blogger of late.
And I cannot promise a great improvement in the very near future, as it is time for the annual
(ta-da-da-da....)
BGPC Beach House Retreat!

This will be the third retreat I have done since the beginning of November. No wonder I can't get ahead, if I am constantly retreating.
I regret to say that there is no Internet connection at said Beach House, so I will be incommunicado until Sunday......
But you can look forward to some great pictures & stories then!

Meanwhile, here is a link that will give you something to do:
http://blog.craftzine.com/archive/2008/12/how_to_fabric_scrap_wreath.html

Since part of the Beach House Retreat is a trip to JoAnn's, I'll be looking for a wreath form and making the item above. I'll get scraps from our various projects so everyone will be represented in the wreath.
This would be fun to do on a guild retreat....you would have even more scraps!

CRAFT is a very interesting little magazine with very modern/ young/ edgy sorts of projects. If you enjoy making off-the-cuff, weird and fun craft items...or just like to look at them!...this is for you.
There is also another publication, MAKE. That's for people who are crafters at heart but like to use technology to create. Take a look at that, too....if you're a geek you will love it. If not, you know someone who will!

The idea of being at the Beach House this time of year is that we can sew-sew-sew, making many gifts for the holidays ahead. (We also eat-eat-eat, despite trying to maintain control).
I will be making "Green" shopping bags for everyone this year.
If you can't wait for my pictures, take a visit to AnotherPatch and see Pat's ultra-lovely bag tutorial...which can also be made undecorated, for those who are running out of time!

What is your favorite fast, inexpensive, or last-minute gift?
If you'll share your secret, let us all know in a comment!