Tuesday, June 24, 2008

Florida Quilt Shop: Byrd's Nest II

Decisions, decisions***.....
sometimes we let an outside force take over!
In this case, a by-the-way sort of e-mail, and the fact that we had not been to Byrd's Nest II made the choice to stop on our way back north. There is one in Ormond Beach (well worth a visit!), and this new one in Flagler Beach.You can find it right at I-95 Exit 284 (SR. 100), on the east side.
First we poked through all the Pfaff machines & supplies (boy, did I need some bobbins!) and took a look in the classroom where the ironing board features a tie-dye cover.

What! It's another Wall Of Batiks!
This is where I gave in to the green polka dots on black...just like the red ones I use for the binding on the Perky Old Men quilt. And yardage of a wonderful light blue... I am always looking for light colored batiks. I am very picky about them, too, as so many have a grey cast.
Well, something has to limit what we (I) buy!

Love those bright colors! And the holiday fabrics are showing up now, too....
Yes, there are some things I don't care for!
But not much!

I am sorry not be able to show you the other fabric room, but doing so would reveal the faces of three members of the BGPC. I had intended to use the picture for blackmail, but I'm sure the husbands already know about their fabric habits.

I'll soon be headed off again to share my over-flowing scrap basket with another group of fabric lovers, so watch for more pictures and perhaps a Hot Tip or two by Monday.

*** at the very same Exit 284 (Rt. 100/ Bunnell on I-95) going west for a short distance, you will find the Sew & Quilt Shop, another favorite!

Monday, June 23, 2008

Florida Quilt Shop: Fireside Quilt Shop in Sanford

It was road trip time last week, so I filled the Quilt Mobile with members of the BGPC and off we went! Our first stop was the Fireside Quilt Shop & Gifts in Sanford, FL.

You can't miss the blue awnings in this short strip

There are some months in Florida when it's possible to sit outside on this lovely bench. Shop owner Kendra Race has thought of everything, and the shop is filled with nice touches such as this wonderful place to park non-quilters who are traveling with you:

Even marathon shoppers like a place to rest their feet!

Plenty of comfy seating, some non-quilt magazines, newspapers, and a TV with remote control (that's the black thing on the table, so those of you who are fairly sure you know what one is, but may have never held one in your hand). And I didn't even get a pic of the wonderful coffee bar! (legs provided by 3 mysterious members of the BGPC)

OK, now how about that fabric?
We arrived on the right day, as a large portion of the shop had 50% off signs!
I do love a sale, and also a shop where the fabric keeps moving along to make room for new bolts.

This shop is goes 'way on back

There is somethig for everyone here, with large selections of fresh contemporaries, reproductions, holidays and batiks (my personal weakness!)
What's behind that pattern rack?

Somewhere in here is just the color you need

It's wall of batiks (hidden to the right) that ends up with a fabulous assortment of collections in long color runs! And brights...I do love those jewel tones!


This post would be far too long if I showed a picuture of everything in the shop, so you'll just have to check it out for yourself.
If only I had room at home for this baby!

I have no idea what the turn-around time is for their quilting service, but in talking to the ladies at the shop I had a very good impression. They all know quite a lot about the quilting industry and have attended machine quilting classes & shows around the nation.

Nobody is paying me to say any of this! I just want to share great places when I go (and will also tell you if there is somewhere I was not happy!).

When it comes to lunch, there are some places serving better food than others, and some places where it's just the atmosphere that is fun. We went to lunch with this guy, who is the object of one person's long-time love affair:

The Big Boy...he only has eyes for...guess who!

Fortified with a variety of desserts, we headed home by way of another shop...which will have to wait for the next post!

Tuesday, June 17, 2008

Machine Quilting Free-Style (almost)

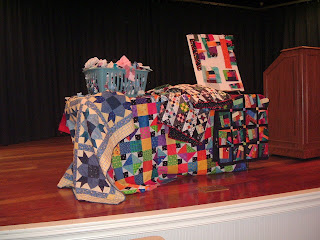
It's time to reveal some of the truths about machine quilting.
Or, as Harriet Hargrave likes to say, "Hand quilting with an electric needle".
In this case, I am quilting on a top that was made by someone else, although I have only myself to blame for the basting.
You have to choose your own priorities, and mine is to sacrifice the back if it will make the top look better! So my first job was to wind some bobbins with thread to match the top...but I was out of bobbins!
When that happens, something has to go.


This pink rayon thread has been retired!

I found two bobbins that were less than half filled, and removed the thread. I worked really fast, and was able to throw this in the trash before my PackRat genes engaged and made me create some sort of craft project.
The quilt is red, white and blue (though not patriotic) so I wound a bobbin of each color.

I like to do any in-the-ditch quilting first, though there is none on this one, due to the way the seams were pressed (something I could have fixed, but did not...a terrible vice on my part!).
Instead, I thought I'd quilt 1/4" inside the seams. That was nice, using the regular foot and feed dogs up. All I had to do was pay attention to some odd angles when making a turn.
Straight line stitching will pretty much stabilize the quilt all over, so then you can remove pins (if you basted with them) and free-motion one area at a time.
Then I spent 3 days thinking about how I was going to quilt down all the white background without doing any stippling!

This is going to be a very puffy quilt!

I went for the easy part first, the little square in the center.
Using a blue washout pen and a ruler, I made a dot right in the center.
Starting at that point, I made a big loop into each corner. Then I made another loop toward each side. Suddenly, I had a flower!
OK, now I'm on a roll.....I figured how to do the same thing for the other white areas (the hexagon? the lozenge?).

The blue pen! I can see it! I can take it out!

I like the blue washout pen....you might, too, but follow the directions! COLD water only to rinse it out, don't leave it on for days & days, NO SOAP the first time you wash the quilt.

Yes, it does take two lines to find the center.

Usually there are all sorts of lines, corners or other places on a pieced quilt so you can line up ruler. All I am looking for here is the center of this space, to put a dot where I will start and stop. I am not going to draw anything with the pen.
I am going to draw with my sewing machine needle and thread!

Needle down...don't leave home without it!

I started at the dot with some tiny stitches, and then moved down towards the point, made sure to loop through the seam allowance, and then returned to the dot. After that I looped up to the top and cam back down. In the picture, I have stopped before getting back to the dot.
Stopping during free-motion quilting is tricky, and it helps to have "needle down" on your machine. When you start, don't move the quilt...let the needle go back into the hole before you start moving. This will tend to help keep the line smooth, instead of having a little jog in it.
No "needle down"? Just turn the flywheel with your hand for the same effect!
You do not need have to have a fancy machine for quilting, just a nice strong one with a good straight stitch. In fact, many old machines are better than the new embroidery ones.

The quilter's secret friend!

Occaisionally, that white thread jumps right out into the dark blue area! Why can't you see it? Because I have colored it over with a permanent pen.
IMPORTANT TIP: be sure the ink is dried before you do more quilting, or you may end up with a mark somewhere you didn't plan on! I sometimes wait until I'm done for the day, then cover up any stray lines and let the quilt lay flat to let the ink dry. (It may be possible to remove permanent pen marks that have not been washed & dried by using a Q-tip and alcohol).

My pattern for this shape is "Lazy 8s and Lollipops" (just invented today!). The 8s are the loops toward each point of the shape, and the lollipops are a straight line with a circle at the end, and then stiching right on top the line back to the center. That was because I need just 4 more areas to have the seam allowance held down.

OK, let's take a look at the back...and you would know, I chose the worst looking spot for this picture!

I still say the back is not as important as the top...NQA certifed judges would not agree!

The true queen of machine quilting is Diane Gaudynski. She uses a regular home sewing machine, so check out her tips on her website to learn what she does. She does not run the machine at a very fast speed and create a firm line of stitches too tiny to see.
That's what I am aiming at....even stitches that you can see.
My aim may not be so good, but I am getting there!

I also suspect that excellence has to do with the amount of quilting you are willing to take out and do over again.
So check out my quilting if you see my quilts! I will not be winning any awards for excellence!
But it's bound to make you feel much better about yours!


Tuesday, June 10, 2008

Quilt Sleeve: Almost show style!

The infamous church quilt is done, and the sleeve has been sewn on!
There are many ways to put a sleeve on a quilt, and I thought I'd share mine with you. This will give you all Summer to get a sleeve on one of your quilts and be ready when Quilt Show Season starts up again in the Fall.


This sleeve is made with two fabrics from the quilt. A great tip is to make the sleeve with the leftover fabric, and then it will be available if the quilt ever needs a repair (that is a nice thought more than a requirement!).
These instructions will make a tube-style sleeve the generally required "show width" of 4" to allow for a hanging rod to easily slide inside. If you have ever hung a show, you know that a small sleeve can be hard to fit a rod through, and could cause damage to your quilt. The extra fabric against the quilt back provides another layer of protection.


The back of the sleeve

I cut a strip of each fabric 9.5" wide and then sewed them together on the short ends.
Fold one short end in twice and topstitch to make a good edge. Measure how long the sleeve needs to be (just inside the binding at each side) then add an inch and cut the long strip to size. Fold in that end twice and topstitch.
Fold the sleeve Wrong Sides together and stitch along the long edge to make a tube. This seam will go against the back of the quilt, so why sew a tube that is difficult to turn right side out? The thread is a good match, but you can see the seam there in the center...twisted! But it won't show, so I don't care. It's on the back!


It's the end of the sleeve, but not the end of the job!

Next is to add some room for the hanging rod, so when you quilt is in the show it doesn't have that stuffed roll along the top, just like a guy's too tight collar with a big fat tie!

The sleeve is flat on the back and has extra fabric on its front

I accomplish this by pressing the sleeve flat, then pinching up the center about 1/2" or so, and pressing again. That makes a crease at the top and bottom edges of the sleeve (and if you crease the pinched up part it's OK!).
Then I baste along the crease (see the stitches?) just to hold them nicely for the hand sewing part. That would be optional, and it all gets pulled out later.
If you are making a quilt for your own home and plan to hang it on a flat lathe strip or something similar, you won't need the extra poofy fabric built in this way.


If you forget to sew a finished end before making the tube, you can still fold the end inside. It's just easier to do when it's flat. But do stitch it down, so the hanging rod is easier to insert and also won't catch as it's coming out the other end.
Major Tip: If quilt show rules have you confused, you should volunteer for hanging the next one possible. You will learn why most rules exist, or wish that show had better ones! And sign up to help with the judging, too...that's a real education.

In a perfect world (please send location if you know where it is!) we would all have quilts just like the photos in magazines and the diagrams in books.
What I like best about the sleeve is that it is on the back!

OOPS! Who measured for THIS sleeve?

Did this quilt grow over night or what? This is also the end where I had to add some extra backing! But I try never to be stopped by own mistakes, hence I am The Queen of Fudging-It!
There probably is not a mistake I have not made, and will be making again at some time.
When you mess up:
1. Say "oh, darn" or other favorite phrase
2. Feel a bit disappointed for 30 seconds
3. Get on with it! Necessity IS the Mother of Invention, and it is also the Best Friend of Creativity!

The sleeve should go from the inside edge of the side binding right under the binding along the quilt's top (it makes your sewing guide) and end at the other side, just inside the binding.
This is hand sewing for me, as is the binding. You can use any stitch you like. There are methods of doing it all by machine, and if that works for you, have at it!

OK, so the sleeve is 4" short. I have a really good binding (double French fold) and quilting around that corner, so it will hang just fine.
And it's not going in a show, anyway!

If you are entering a show, you have the option of slapping on a sleeve that is meant to be taken off later.
Yes, I actually have long muslin tubes for that very purpose....one time I used a Sharpie pen and wrote "Show Sleeve" across it!
But then, I was not really trying to win a prize.
If the judge has to examine and comment on your sleeve, you have done well to get her/him to be checking that closely! If you really want to win a prize, everything about the quilt counts.
If you don't care about winning, then it's just fun to have your quilt hanging a show so other quilters can enjoy seeing it.

Friday, June 6, 2008

Mile-A-Minute Quilt

What good is a Patchwork Pie if you can't get a slice that you want????
Thanks to a comment/ request, here are some tips about making the Mile-A-Minute quilt in the version I do:

1. Start with a strip and sew scraps down it's length. Press open.

2. Cut the strip + scraps into pieces, then randomly sew those down the length of another strip. Do not keep them in any order. Rotate them around. Press, etc.

3. Sew those pieces down the length of another strip.
For those who would rather see a picture:

Note that the pieces are sewn back on in a random fashion
Eventually you have crazy patch rectangles/squares. They will tend to have straight lines because you used a lot of strips.
Decide how large you want the block to be. I like a size that is the same as a square ruler (6", 8", etc.). You need enough pieces sewn together so the patchwork is larger than that block size.

This looks suspiciously like a log cabin type block
Use the ruler to cut out a block BUT do not line it up along all those straight seams!
You need this to be larger-than-block size so you can lay the ruler down at an angle.


Disclaimer: my favorite rulers are actually OmniGrids!

Now just cut it out with the rotary cutter.
Don't worry about the bias edges too much, just handle them with a bit of care.

This looks much more interesting!
This sort of quilt does well with sashing, and that makes everything straight grained again.


Hey...this quilt has legs just like a ironing board....

So that's the Mile-A-Minute.
It's like making your own fabric, so you could cut any shape you want. It could even be a piece in another quilt block pattern!

Remember to turn the cut sections all different ways when you sew them to the next strip, and tilt the ruler as much as possible when you cut out the block.

And I bet you already know what to do with the parts that are cut off!


NOTE (1/ 26/ 11): Making your own fabric out of scraps can be done many ways, and has been done for many years. As I mentioned at the beginning, this is just my version of something that was shown to me by a friend who learned it from someone else. It's very similar to Eleanor Burns' way of making Log Cabins and a variety of art and Crazy Quilt techniques.
Although I've been using and showing this technique for several years, I just recently heard that it has been published as a pattern, with the same name,  by Carol Coski of Quilt Away (http://www.quiltaway.com/) You may want to look into it...I have not seen the pattern, only the cover on her website when I "googled" her name.

Monday, June 2, 2008

The Quilting Guild of The Villages

On Tuesday, the Quilt Mobile rolled down through the Ocala National Forest and ended up at The Villages, a retirement developement that has 70, 000 residents, it's own hospital and zipcode....and 450 quilters!


Scrap Basket takes the stage and prepares to overflow!

Not all of them were there to hear my lecture, but we had a great time. And the ones who were there got the free class part about Mile-A-Minute quilts (that's what you see on the board).
It pays to show up at guild meeting!
Everyone loves the Show & Tell part best, (me, too!).
These ladies had some wonderful work that ran the whole range from a 1992 UFO Mariner's Compass finished at last, to some great comtemporary strippy designs, and a black & red one that almost glowed...backed with Minkee!

The Quilting Guild of The Villages is having a show at the end of January. You can find out more about it here.

Right under the Mile-A-Minute demo board you can see the quilt top I made with that method. It's going to be a birthday gift. But will it arrive on time?
Stay tuned!