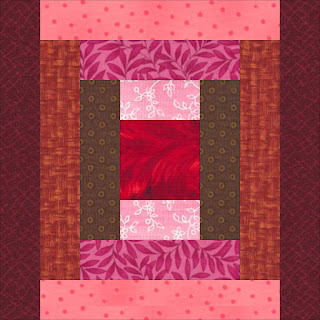
Having a first project planned is a good way to easily switch from one huge activity (stripping my scraps) to another (actually sewing!). So as I was cutting the Pink fabrics, I decided to make a Pink & Brown Log Cabin quilt...and those strips went into a separate box, right from the beginning.
 |
| Better than a jelly-roll! |
The Truth About Log Cabin Blocks
It looks easy but it isn't!
If you've made this block, you know what I mean: All the strips are the same width...the seam allowance is 1/4"...why do they come out wrong?
The size is wonky, the strips are all mixed up...how can such a simple block not work?
Why, Oh Why?
It's because this block goes "round & round" from one side to the next. That pulls it out of square.
This is the same reason you don't put your borders on from one side to the next (do you?). Sewing borders on two opposite sides, then measuring through the middle and sewing the other two, will keep your quilt straight.
But the Log Cabin has to go "round & round"!
How to Make It Work
One fix is to cut all the strips to the length they will be in the block...that works well, especially if all the blocks are colored the same, all the strips are the same length to start, and you keep everything in order.
I'm working very scrappy here (besides being immensely lazy). So I like to sew the strip on and then cut off the extra.
 |
| Let that strip hang out! |
You can see the extra bit, so when you line up the next strip don't use that part to match the raw edges.
Go ahead and sew 2 Lights and 2 Darks to complete a round, which makes the block look like a square. Don't count the center square, just the sides you sew on.
I made a Trimming List of the raw-edge sizes for each round. These are 2" wide strips, so my list was:
First Round- 5'
Second Round- 8"
Third Round- 11"
The finished block is 10.5", an odd size, but they only need to match themselves.
You can make blocks any size you want, wider or narrower strips, several more rounds.....figure your Trimming List by adding the finished size of each piece (include the center) plus the 1/2" seam allowance which is already there on the outside edge.
Here's how to trim:
 |
| First trim two sides... |
(Lefties! I love ya'! This is actually something you can just reverse "right" to "left" and it will work).
 |
| ...then rotate and trim the other two! |
Trimming at each round will help correct for the "not perfect" seam allowance.
More Secrets!
Just two...I know you're ready to quit reading and start sewing!
1) Be consistent! It doesn't matter so much how you sew this block as that you do the same way each time: Light OR dark goes on first; last strip sewn on goes TOWARD you or AWAY; block OR strip is on top when sewing. This will keep the strips going around in the same direction...clockwise or not, they all do need to go the same way. And this keeps the direction from changing in the middle of the block!
Not being consistent will create many artsy or odd blocks...that's another choice, for a different quilt.
2) Press the seam before trimming. Open or to the side is your choice, continuing to be consistent either TOWARD the center or AWAY. If you have scissor-cut the excess strip length, this is where trimming evens it up to be exactly square (if it isn't already hidden in a previous seam allowance).
3) Chain-piecing is wonderful for these blocks. You really MUST press before trimming each "log" with this method. If you keep adding blocks until the strip is filled, the blocks start out the same, but eventually, as new strips are added, you end up with blocks at many different stages (rounds and values). See #1 above!
 |
| Very scrappy blocks are pushing the value placements! |
Quilt mythology has it that the center square is red for the warm hearth, or yellow for a candle in the window to guide someone home. You can make it whatever color you like, but its value will increase the amount seen on one side or the other.
I tried to stick just with using values, so the Pinks are both light and dark, as are the Browns. When using 2 colors, some people like to keep them on separate sides.
If you look at antique quilts, what seems "Pink & Brown" is usually loaded with additional colors. I think a touch of blue keeps it from being boring. For a scrap quilt, choosing prints that look mostly the color you want will naturally bring in additional bits of color to please the eye.
Well, that's my story and I'm sticking to it! There are lots of other ways to build a Log Cabin, and I'd like to hear your thoughts. too.
And, of course, if you just want to avoid the whole "round & round" issue, you can make the block called Courthouse Steps...adding the strips to opposite sides!

No comments:
Post a Comment