Monday, February 28, 2011

Quilt Show: Amelia Island "Quilts By The Sea"

Last Friday it was time to jump in the van and head up to Fernandina for the 12th triennial  quilt show of the Amelia Island Quilt Guild! That's right...this guild has their show every three years. From the look of things, those were three very busy years! Let's take a look at just some of the wonderful work...(as always, I will be glad to remove a picture if you have a problem about it being here...just let me know)(likewise I'd be happy to add the titles of any published patterns!).
"Halloween Delight" by Deborah Dunman
Setting the categories for a quilt show is challenging...you want to have the quilts that best go together, but you can't have everything. This quilt was in the Holiday category, which was almost all Halloween or Christmas. What I liked about this one was the "redwork" (did you know blackwork is actually another style of embroidery?) done in black thread. The illustrations must have come from old Halloween greeting cards.
An interesting category was Quilts for Children. What a great idea! We love to show and share these kinds of quilts, even though they were never intended for being Best of Show... but maybe Best Loved!
"Camouflage" by Charlie Russ
This quilt features at least two fabrics with a Marines theme print. The other fabrics came from the uniforms that belonged to the owner's father.
"Happy Pineapples" by Janet Sebastian
Happy indeed! This quilt had everyone smiling and snapping pictures.

There were also quilts made by Young Quiltmakers. There was a great challenge, where the guild members had to do a self-portrait...as a flamingo! And there were the miniatures, and a category for Miscellaneous, so jackets, table runners and bags could be shown.
There was even a Non-judged category that had this fun quilt:
"9-Patch Gone Wild" by Frances Barnett
There are many wonderful stories that go with quilts. The string pieced one below was sewn as a memorial from clothing that belonged to the maker's aunt.
"I'll Fly Away" by Dell Dunman
  When Dell found she had sewn some blocks turned the wrong way, she took the quilt apart and carefully laid them all out again to be sure. After the quilt was finished, there was one block turned around...surely her aunt had done it!The title is from the aunt's favorite hymn.


Untitled by Emma Sanders
This pretty red & white quilt has a cross-stitch motto about how a woman has to be twice as good as a man.....you know the rest! I like to see redwork mixed with piecing.
"Along Dorothy's Road" by Mike Polese
Poppies! Poppies! But these won't put you to sleep! They were in the Art Quilt category, along with this small quilt:
"Whine Not" by Gail Niedernhofer
The embellishments are wine corks. This was a favorite of several people I talked with, and surely had some reds we'd like to try!
The Amelia Island guild has a number of members doing real quilt art, and it's always a pleasure to see.
"Celebration" by Sandi Neal
I'm a sucker for anything lime green! This really does look like a celebration.

"Julia's Garden" by Sally Winston
 This is an inspirational quilt. Does it make you want to do a collection of little appliques?
I am guessing that Julia likes pink!


"Purple Passion" by Faye Justice
 It's not how complex or time consuming a quilt is to make, it's all about what you want to make! With just three fabrics, and a fairly easy pattern (my favorite: Snowball and 9-Patch!) this quilt really makes a statement.

"Oceans of Love" by Janet Sebastian
Do you see quilts at a show and are reminded of a friend? I have a friend who loves bargello quilts, so I'm always thinking oif her when I see them. This one is especailly well done for the seaside effect.

"Rainbow Tiles" by Shery Inserra
Not only is this glowing with beautiful colors, it really asks you to look closely and see if you can figure out how it all went together!

There are quite a few good machine quilters in this corner of Northeast Florida, and the show was filled with excellent quilting. There were practically no quilts that were done poorly or needed a great deal more quilting...and none that were quilted so much they were "over done"!
I only regret that I didn't get the names of all the quilters...they were on the quilt tags, but not in the program.
"Big Red" by Emily Baker
Deciding how to quilt can be a tough choice...there is no one right way to do any particular quilt. This is a lovely use of feather motifs on a pineapple pattern.

"Sara's Pinwheels" by Gail Niedernhofer
More well-done feathers in a lovely varigated thread to match the hand-dyed fabrics. This is the real big thing sweeping the quilt world...using colored quilting thread as an important part of the entire design. 

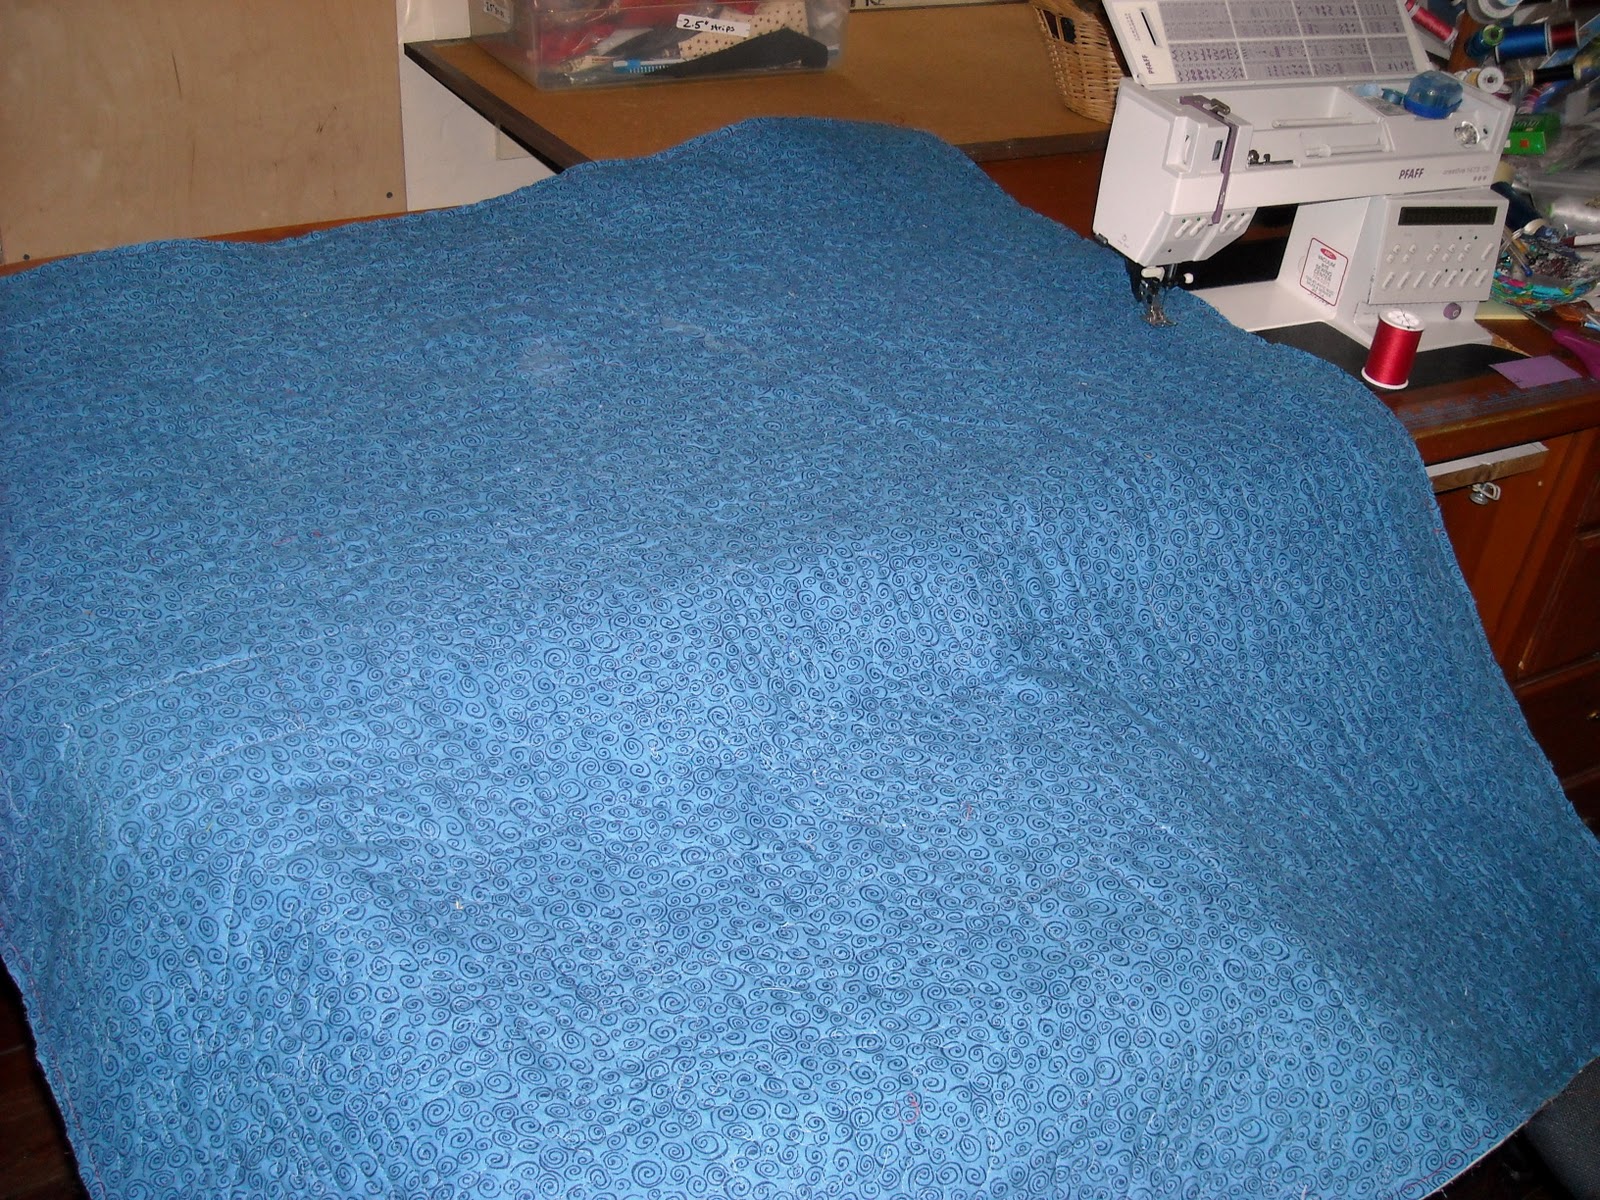
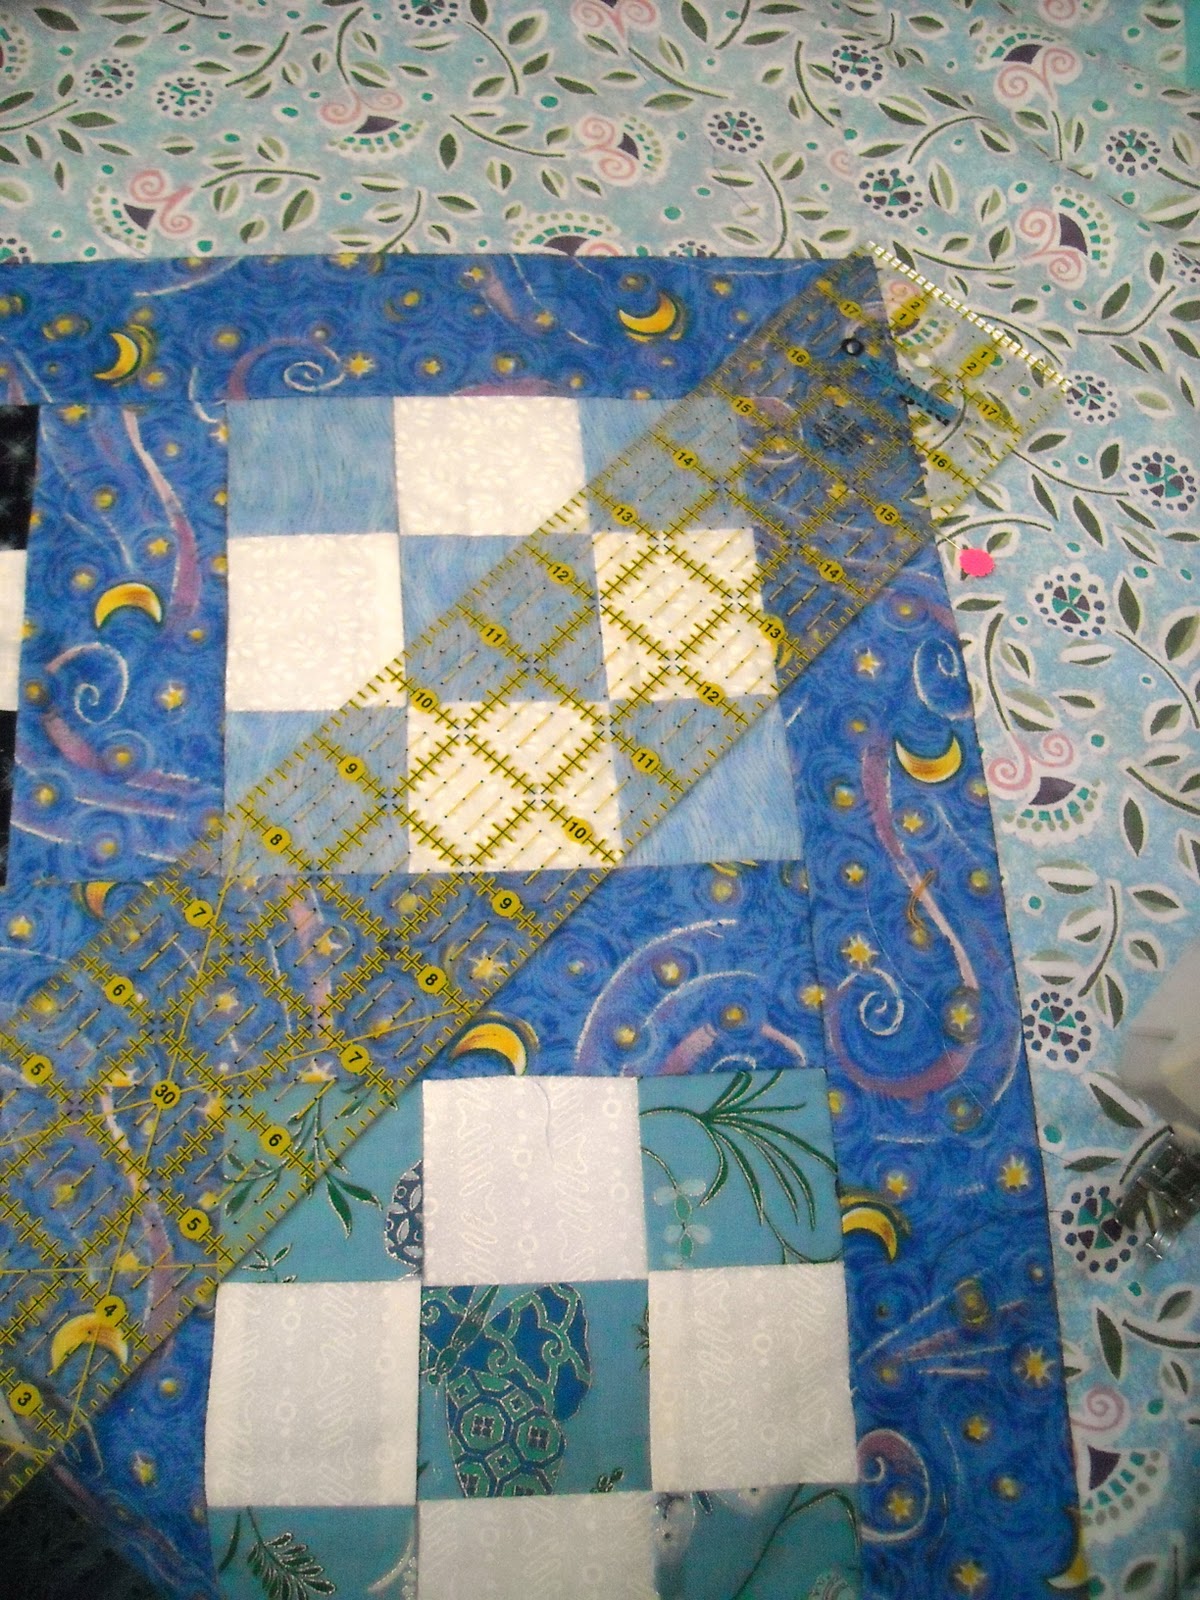
"Stars and Seashells" by Suzanne H. Driver
The maker here used her collection of seashell patterns to fill in on this simple blue & white quilt, showing that it does not have to be all fancy and complicated to be beautiful.

"The Ultimate Sacrifice" by Diane Keagy
Another example of how simplicity can tell as much as a mass of detail. This could have been quilted with all sorts of creative motifs. 
Yet the simple grids of the sashing, and the diagonal lines in the rectangles providing a small contrast, offer all that is necessary. The point (again) isn't always about how long it took, or how hard it was to do.

Awards and ribbons are a big part of any quilt show, whether or not you're in the competitive spirit.
The Amelia Island guild had some very pretty ribbons for all the prizes, especially for the major awards.
 The special awards featured an embroidered medallion with seashells and the "AI" initials for the show.
Besides the certified judge giving the place ribbons, I love it when there are some special awards. There was a President's award (kind of tricky for a single guild show!) and then I saw this interesting award:
Yes, that's the Mayor's Choice!  What a great way to be sure the city officials are made aware of the power of quilts to bring people to their communities, and also to get them into the show to find out what quilting really is!
 I spoke with several people who were attending a quilt show for the first time. They were amazed at the artistry of the display...and they were people who know quilters!
Oh, yes, the quilt that won this ribbon:
"Sunset in July" by Pam Wise
 
Among the many fine kaleidoscope style quilts (Stack N Whack, One Block Wonder. etc) was this beauty:
"My Garden" by Charlie Russ
 It received an award for "Best Use of Color", and we had a grand time discussing why.


 Saved for last...here it is... the Best of Show "Silver Streak" by Pam Baity:

The three ribbons also include it's first place for the Mid-Pieced category and a special award for machine quilting. The pattern is "Turning Twenty".
The solid black fabric in the border was stitched completely around with this lovely design, using silver thread. The crystals were used with good taste, and it really did glitter nicely from across the room.
Of course you want to see the back! Note the curved corners. You have to use bias binding for that, but it lets you skip the mitering that some don't like to do. However, you still have to do it well. If it's pulled tight, the corners will cup up and stick out.

This show had all the other things we love: vendors, a boutique, gift baskets and quilt raffles, plus a quilt appraiser. And there were many more beautiful quilts than I'm showing here!
Thank-you, Amelia Island Quilters, for a wonderful show! We wish you a productive next three years so we can come back and see more!

Monday, February 21, 2011

Quilter's alert: UFOs are landing!

Today at the quilt guild meeting we had the first round of Show & Tell for our latest UFO attack. (Un-Finished Object, if you didn't know).
There were more finished UFOs than regular Show & Tell items, so that means it was really time to attack!
I had two quilts in each category, but honestly, they were all UFOs! However, I can only count the ones I handed in on my official list!
 Quilts are so nice when they are finished! This one is about 54" square, and I can hardly remember making it. But I'll never forget it now...it was not basted when I started quilting it!
I must have planned to baste it, and had a flannel back and batting all ready to go...but then it ended up in a pile with the other tops.
Here's a tip: if it's not basted yet, don't fold the 3 layers together so it looks like it is!
I started in quilting and then decided the check the back...and discovered about 6" missing from the backing on one side!
Yes, the same amount was hanging over past the batting on the other side!
I cut the "extra" off and moved it over to the side where it belonged..
Thank goodness the flannel backing and cotton batt were clinging together...there is not one pucker or pleat on the back of this un-basted quilt!
I also finished the Big Box Challenege from last year.
I had purchased 1.5 yds. of background fabric and a package of fat quarters at JoAnn, with no idea of what I would make (hence the title). I cut everything into 2.5" strips, and eventually ended up with this:
What fun! It's quilted with varigated thread now, too, and bright lime green & yellow binding.
These are going to the sale room at the quilt show in September!
This is from a class that Cherry-cherry taught a long time ago.  The technique came from "Tumbling Triangles" in Karla Alexander's book Stack A New Deck (Martingale). Lots of fun patterns in that book use free cutting techniques.
This one has been sold already, and a lucky baby is really going to get some real visual stimulation!

The fourth quilt is the one from the last post, with the blue & white 9-patch blocks. It went immediately to the community service chairman to add to the other quilts we give to foster children.

Whew! You'd think I had made some real progress.
But noooooooo (as John Belushi would say). The stack of UFO tops is still in the double digits...and in the process of a bit of studio cleaning, I encountered two more UFOs still in the piecing stage.
I know there are even more hiding out. I am ignoring them for the time being (one I have been ignoring for over 25 years, and all the blocks are completed!).
The best thing about having a UFO list with numbered spaces is I only have to think about the 10 that are on the list! And I put two on that are really Mom's UFOs, so that's even better.
But I do have a load of quilting ahead!

Sunday, February 13, 2011

Quick Quilt Valentine Card

On Valentine's Day I have a huge quilt guild event (we are training to have a Quilt Discovery Day next month) and by the time I get home, my husband will be off to his woodturners club meeting...so we're celebrating another time!
But I still want to give him something tomorrow, so I made this card in about 30 minutes (don't tell!).
I have some TimTex or PellTex very heavy interfacing pieces cut to about 4" x 6" for making fabric postcards.
Just a few shots of spray baste will stick the "card" to whatever you want for the front. I hold the card inside my trash basket so the spray doesn't get all over.
For the front I found a nice scrap of a batik strip set. If you have something with straight lines, it looks nice to stick the card on at an angle.
Once it's stuck to the fabric wrong side you can just rotary cut to trim off the extra fabric.
If you stuck the card to the right side of the fabric, just peel it off and turn the fabric over!
Another batik scrap for the heart...I almost chose a true red one, but this had more interesting colors!
Cut a square of paper-back fusible web about 3", fold it in half, and cut a heart shape. Yes, just like you did in school! Fuse that to back of the colored scrap, then cut out the heart and fuse it to the card. If the seams lines are diagonal one way, make the heart tilt the other way.
Or put it on the way it looks best to you. Your eye knows better than anybody else what you need to do!
Here's a good time to use a fancy stitch on your machine, though a zig-zag or even straight stitch would do.
I used a buttonhole stitch but made the little side-ways stitches go to the outside.
The top thread is metallic gold, and in the bobbin I had orange....and really lowered the top tension so the gold would all pull to the back.

To add a message, I wrote with a blue wash out pen (in case I messed it up, the mark could be removed).
This is actually the finished card front, because I decided to use teal thread!
I put on the darning/ free motion foot, dropped the feed dogs, and set the machine for a straight stitch (still low top tension, still orange bobbin thread!). Then I just traced around the letters, going back over them and to the side a bit to make them thicker, filling in if a space showed up. You don't want to run the machine pedal-to-the-metal, or too slow. Just go back and forth like you are coloring...which is what you are doing, using a needle & thread instead of a crayon!
The stitches are so tight & tiny, there is no worry about them pulling out. And a back goes on the card, which also holds things in place.
I had a nice message for the front, so I wanted something fun on the back. Isn't this great fabric...wood shavings, for my woodturner!
It could easily have been a plain fabric and a written message on the back.

Finish off the edges with a close zig-zag...I put the gold metallic back on, and left in the same orange bobbin, which blended well with the wood chips. Don't forget to put the feed dogs back up!

Something like this would do fine for a fabric postcard, although I add another layer or two to mine to keep them firm enough to survive the mail...but that can be a post for another day!

Friday, February 11, 2011

Return of the Fleece Quilt

When we last met here, I was telling about making a quilt with one layer of fleece that works as both batt and backing. This is an ideal combination for any charity quilts or other utility quilts.
It's also possible to use basting spray, which certainly speeds up the quilting process.
And, of course, a supervisor is necessary for any project. Shayla is taking her Studio Cat duties seriously.

It can be difficult to decide how to quilt something, even a small basic item.
That's because there is no one right way to quilt anything!
Having quite a few 9-Patch related quilt tops, I figured out something I call Alternate Diagonals (not very catchy...) which, no doubt, as been thought up by hundreds of other quilters. It's all long lines, so you can leave to feed dogs up and let the machine make nice even stitches.

The darker blue sashing is the same width as the squares, so it is included in the plan. The border is too wide.
Just start at one corner and quilt a long line down through the squares, eye-balling from corner to corner.
Go back to the place you started, and skip over one square.
See the pink pin head? That's where you start the next line, and into the blue square. Skip the white one.
These pictures look straight on, but really you will be feeding the quilt into the machine with the whole thing at a diagonal.
The ruler here shows more of where the line goes, right across the sashing.
You could mark this if you wanted to, but with 2 1/2" squares it's easy to just sew/corner-to-corner.
Eventually you get all the way down one side with the starts of each line.
Then you rotate the quilt and sew lines corner-to corner in all the squares that don't have a line.
Instead of an X in each square, you get this:
OK...this is a Two Purpose Picture.
One to show how the lines cross.
The other is to show what happens when those 9-Patches are not made of real squares!
What do you think...if I'd kept a straight line, it would have missed the corners. Is this less noticable? I think in whole quilt it is.
This is your side of the win-win of charity quilts... working out these problems.
So as long as I was already lop-sided, I figured I'd go all the way with experimenting and do...
A fleece binding!
I even thought I'd turn the back to the front, since there was plenty of it! So I trimmed the extra to 3/4" away from the quilt's edge. That was a totally arbitrary measurement.
Well, it would have been better to do a separate binding, as I found out.
But that's what this blog is for...so I can make the mistakes before you do!
Who knew fleece has two straight grain edges, and two stretchy edges!?!?!
Oh, maybe you did.
Anyway, I just turned the edges over and zig-zagged them in place as I went along. I am a very lazy person.
Had I realized two edges would stretch, I would have controlled them by pinning before sewing. I'd start with a pin in the center of the side, then at the ends/ corners, and then halfway in between the first pins.
That would have kept the stretching between each pair of pins, not going all the way down the side!
The wide border just has two wavy lines of quilting going all around.
I told you I am lazy!
The quilt is done and ready to be part of my guild's donation to daniel (it's not capitalized), a foundation that does intake for all the foster children in this city.
Those are the last of my President's Blocks from sometime in the late 1990's. That's what being guild president does, uses up the brain cells and memory. The rest of the blocks are made into two other quilt tops...waiting to be quilted!

Wednesday, February 2, 2011

A Fleece Quilt and a Groundhog

Happy Groundhog Day!
You may know this is my favorite holiday, as I once had a pet groundhog whose name was Charlie. To read more about that, just click here. Or type "groundhog" in the search box.
Reccommended block for this holiday: Sunshine & Shadows!
Here's the most famous Groundhog of All, Mr. Punxsutawney Phil:
If you are watching the weather predictions today, be sure you get one from a real groundhog, not a prarie dog. European readers will want to consult a hedgehog. I would love to know what animals our friends in Africa, Australia and Asia look to.  Antartica is a real puzzle.

Back to quilting...
I just finished this baby quilt, made from the remaining Blue & White 9-Patch blocks I received when I was guild president...about 10 years ago! I made two larger quilt tops from the other blocks...they are in the pipeline to be basted soon.
This one will be a donation to the guild's community service project. I had a nice remnant of fleece, and decided to use it for the backing and batt both, just one layer.
Yes, you can spray baste onto fleece! Cherry-cherry helped me baste several quilts, and this was the first fleece one she'd done.
(much later....)
I am sorry to say, Blogger does not want to connect to my picture files right now, so we'll have to take up the story of this quilt tomorrow!