 This is a totally different version of a Mystery Quilt from back in January
 It is entered in the huge "local"quilt show, so it has to be done by Sept. 12 Turn-In Day. And do stay tuned for more of my blatant insanity, as I have another unfinished entry, too!
I wanted Celtic designs (at this point I cannot account for my thought process, other than I have always wanted to do this) but how to get them onto that black fabric?
So my Big Idea was the draw the designs freehand on some special paper:
 Cherry-Cherry gave me this Golden Paper, one of her favorites.
And as a helpful resource, I have some books:
 I'll give you a list in Part II..there is one more!
And to hold the paper down without a lot of pins tearing at the paper as it is quilted, I thought of basting spray!

 Sometimes the paper has to be adjusted as you go to keep the design inside the triangle
Large open areas are no trouble at all, but that little double line (a very important part of Celtic designs) would be tricky to get the paper out of.
I realized if I just used the paper for the main design areas, they would be broken into smaller sections.

 Keep the torn off section for a reference
The main thing to remember is that you are following a line...sort of...but that line no longer exists once the paper is gone (or blue line is washed out, or chalk rubbed off, etc.). Your stitching becomes the line, and it cannot be compared to how "on or off" it is!
 There are several leaf shapes in there somewhere!
So that worked out pretty well, until I got tired of scraping off all the little paper bits.
TIP: Scratch with your fingernail going the same direction as the sewing line...it won't pull against the stitches and stretch them. (OK, I know you will really pick at them any direction possible, because I did , too! But they might wash out as well.)
Now let's add insult to injury and discuss my bad choice of quilting thread.
I have a lovely salmony pink that matches the back...what was I thinking? Of course it shows up on the BLACK top!
And how many times have I said I will sacrifice the back to make the top look good? Hmmmmm????? The chickens are coming home to roost!
I am sparing you a picture, because A) it's really not that bad unless you are up close, and B) I can't take a picture that close.
I am using a very thin black thread and liking how that looks on the black fabric.
Those who know me have been asking this question: How long did you stick with your drawing & quilting on paper?
You know me so well.
It's true, after 3 paper triangles it was too much work, and I have now resorted to blocking out areas with a chalk marker! The less you need to mark, the more freedom you have
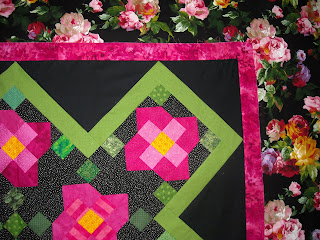
It's easier to do the fill-in patterns free-hand after you've followed several sketched out ones. This will be a flower, the Welsh Rose, with it's big decorative leaves.
Check in soon for Part II, when I have the last of the side triangles done!
There's quite a bit more quilting to do on this, but as long as I have the black thread loaded, I'll launch into The Black T-Shirt Quilt!
With a Very Big Thank You to Cherry-Cherry & Rita who helped me baste TBTSQ this afternoon...a nasty story that will wait for another day! (Hint: "vintage" polyester "black" batting!).
3 comments:
You say "Celtic Quilting", but I happen to have that book, and I happen to know that that is WELSH quilting in the pictured illustration, and I know *that* because I have loved Welsh quilting motifs for years and years and years. I have a folder full of references, and if I (ahem) ever finish quilting the main part of my Amish-style quilt (by hand, black on black, aieee), I intend to put Welsh-style quilting in the borders.
Hurray for you, and for those great quilting designs!
The Mysterious Ms. E!
I'm happy to see that so far you are making that "black on black" quilting thing happen. Since I have not one, but two, of them coming up soon. What were we thinking???
Thanks to Ms. E for the correction!
What WAS I thinking?
Probably the black-on-black quilting had my brain befuddled.
Watch out, CC! I thought you only had one coming up....my biggest tip would be to use black thread in the bobbin, no matter what the back fabric will look like!
Post a Comment