But I still want to give him something tomorrow, so I made this card in about 30 minutes (don't tell!).
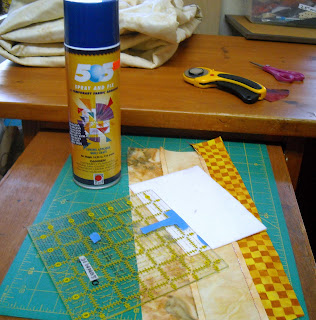
I have some TimTex or PellTex very heavy interfacing pieces cut to about 4" x 6" for making fabric postcards.
Just a few shots of spray baste will stick the "card" to whatever you want for the front. I hold the card inside my trash basket so the spray doesn't get all over.
For the front I found a nice scrap of a batik strip set. If you have something with straight lines, it looks nice to stick the card on at an angle.
Once it's stuck to the fabric wrong side you can just rotary cut to trim off the extra fabric.
If you stuck the card to the right side of the fabric, just peel it off and turn the fabric over!
Another batik scrap for the heart...I almost chose a true red one, but this had more interesting colors!
Cut a square of paper-back fusible web about 3", fold it in half, and cut a heart shape. Yes, just like you did in school! Fuse that to back of the colored scrap, then cut out the heart and fuse it to the card. If the seams lines are diagonal one way, make the heart tilt the other way.
Or put it on the way it looks best to you. Your eye knows better than anybody else what you need to do!
Here's a good time to use a fancy stitch on your machine, though a zig-zag or even straight stitch would do.
I used a buttonhole stitch but made the little side-ways stitches go to the outside.
The top thread is metallic gold, and in the bobbin I had orange....and really lowered the top tension so the gold would all pull to the back.
To add a message, I wrote with a blue wash out pen (in case I messed it up, the mark could be removed).
This is actually the finished card front, because I decided to use teal thread!
I put on the darning/ free motion foot, dropped the feed dogs, and set the machine for a straight stitch (still low top tension, still orange bobbin thread!). Then I just traced around the letters, going back over them and to the side a bit to make them thicker, filling in if a space showed up. You don't want to run the machine pedal-to-the-metal, or too slow. Just go back and forth like you are coloring...which is what you are doing, using a needle & thread instead of a crayon!
The stitches are so tight & tiny, there is no worry about them pulling out. And a back goes on the card, which also holds things in place.
I had a nice message for the front, so I wanted something fun on the back. Isn't this great fabric...wood shavings, for my woodturner!
It could easily have been a plain fabric and a written message on the back.
Finish off the edges with a close zig-zag...I put the gold metallic back on, and left in the same orange bobbin, which blended well with the wood chips. Don't forget to put the feed dogs back up!
Something like this would do fine for a fabric postcard, although I add another layer or two to mine to keep them firm enough to survive the mail...but that can be a post for another day!


1 comment:
Hi, Sunnie!
Thanks for this quick fabric postcard tutorial! And thank you for the recent picture of Shayla, too!
Elizabeth
Post a Comment