Thursday, May 22, 2014

More National Survey of Quilting

I filled out all 16 pages of the survey, and here is my reward:
It was good, and it cost 99 cents at the grocery!
To clarify the previous post, the "Dedicated Quilters" were not the only ones of 2,500 to receive the in-depth survey. They were sent to all sorts of quilters who answer the initial questionnaire, and some of the multiple choice answers reflected that.
One of my favorites was right at the start when you could describe yourself as a Collector, Quiltmaker, Enthusiast, Artisan, Professional, or "Quilt Appreciator: I enjoy looking at quilts and reading about quilting but I have never made, and I don't plan to make, a quilt."

I love that! Whenever someone says they "could never make a quilt", I always tell them they don't have to... we need people to appreciate quilts, too!

Many questions allowed several choices, which was good for capturing what quilters really do and think.
I want to share a couple questions with you...how would you answer these?


Why do you make quilts?
12 choices there, including the popular "Other" with a line to fill in.

In the past 30 days how many hours total did you work on quilts (which included attending classes, meetings and any other related activities.) That was followed by:
In the next 3 years do you plan to spend the more time, less time, or the same amount of time making quilts?

It seems to get even more specific as it goes on:
How many hours per week do you spend working on quilts?
In the past year, approximately how many of each of the following projects did you start?
That included 8 sizes, fashion, functional items and dolls!
I had to look at my calendar to even make a guess at some of this!

One of my favorites was:
What are some of the reasons you don't finish a quilt project?
They had 10 choices there. Would you mark this: "Make a mistake and abandon the project"?

I did mark "Find a new project I'm more interested in."
This one, with the one above, gave me pause to think about UFOs. Some of those are started and not done...until 10 years later! 

They had a list of 46 techniques you may have used in the past 12 months, and might be planning to use in the next year! That was good review. The list meant I didn't have to recall everything I'd tried, and I was pleased with the 22 I marked.

In the middle of the survey is 4 pages of TOOLS & SUPPLIES: do you own that item? Purchased in the past year? Plan to purchase? Purchase in person at a shop/show, online or mail order?
Yes, there were many times I was glad this is an anonymous survey because it proceeded to ask about amounts of money spent.
So ask yourself, in the past 12 months, how much have you spent on "miscellaneous" quilting supplies? Not including fabric (that takes it's own entire section). 
And what is the value of all the tools, equipment and supplies (not fabric!) you own...the cost to replace them all if you had to buy them all today!
Some of us have been quilting for so long that everything has doubled in price since we started!


I was doing OK until they asked the same questions about fabric.
Really, how much fabric do you have in your stash? And what would it cost to replace it all, at today's prices? ***
I tend to count my fabric about the same way I keep track of calories and "serving sizes"!
Batik stash... because you can't just have one!
(yes, that is  a laundry basket on the bottom)
The survey goes on to ask specifically about thread (I had to guess, I cannot count that high), sewing machines (5?), quilt shows (unfortunately, I do know how much I spent to go to Paducah!), and computer use. Whew!

Time to mail this survey in it's post-paid envelope and bid a fond farewell! I have done my bit for the Quilt Industry, and hope to see it remain healthy and growing for many years!
.
***who remembers how thrilled and yet aghast we were to pay $5 per yard for a yard of that new metallic accented Hoffman print???

Tuesday, May 20, 2014

The National Survey of Quilting in America!

Every three years or so the quilting industry does a huge survey to find out who is quilting and--even more importantly---what does that person want, and how much will she spend? (I can ignore the occasional "he", so I'm sure the male quilters can ignore the "she" until English starts using some non-gender pronoun).
The DP Research firm starts with 20,000 surveys in general, then, of the people who call themselves "Dedicated Quilter", they send an in-depth survey to about 2,500.
I am a Dedicated Quilter!
My opinions:  Not 2 cents worth, but 100!
Have you ever received this survey? I have been in on it a couple times, but not for awhile.
In 2010 the dedicated quilter was female, age 62, had a higher education, and 2.7 sewing machines!
You can read more results here.

The survey has eight 2-sided pages, so there a lot of questions. I am happy to be part of this study, but some of those questions really cause some deep thought. When someone wants to know the total amount you spent on fabric in the last 12 months...and you've just been to Paducah...well! It can be close to soul-searching!
I'll be sure to fill it out honestly, and then mail it back before anybody else gets a glimpse! It is, fortunately, both confidential and anonymous!

And I will need to use that nice "dollar bill token of appreciation" for my "efforts" to get a big chocolate candy bar.

The results usually come out for Quilt Market in the Fall...until then, when I come to an interesting question, I'll share with you.

Monday, May 12, 2014

Machine Quilting A Special Motif

Why is it a good idea to carefully press the quilt top and pick off any excess threads?
Because those threads will come back to haunt you...especially on a white piece!
Tools of the trade: a pin and the teeniest crochet hook possible
Yes, it is better to deal with them before you have spray basted the quilt layers!
I thought it was nasty to fish them out back in the days of pin-basting...but I am here to tell you, there is no place to go once those layers are glued together!!!

Sometimes I just pretend they are not there, but on this quilt I had a place to do a special quilt motif...so of course, it had to be were there was a big dark thread. But now it is gone!
You gently wiggle the hook between some threads in the fabric, and then attempt to snag the intruder. Once it has been removed, rub the hole, 
and the threads should close up again. This is one reason for using 100% cotton fabrics, as silk or polyester will not close up again!

I wanted to put some Korean Wedding Ducks on this quilt, because they are on the wedding invitation.
A pair of decorative ducks are often given to a couple when they marry. The ducks are on display in the home, and when the couple is happily getting along, the ducks are facing each other. If things are not going well, the ducks are looking the other way! What a great visual clue. I think everyone should have ducks to tip off their guests, in-laws and maybe even their spouse!


The invitation and the quilt motif

I found a nice duck image and then copied it and reversed one so I'd have the pair facing. They have patchwork wings, too! So I drew it all onto TearAway stabilizer and pinned it on the quilt in the spot I had planned.
Happy ducks!
Next I free-motion stitched around the shapes, and then pulled off the stabilizer.
Duck on the left still has stabilizer
After that I echo quilted in some more water ripples and added the cloud-like motif from the other sections as sky.
It worked!
I am rather pleased with this little touch. The fact that the Sharpie I used for tracing seems to have transferred a bit onto the fabric actually helps. We'll see what happens after I wash the quilt!

Join me tomorrow for Quilting Fudge Factors, or This Has Happened So Often I Just Go On Ahead Because I Know What To Do!

Sunday, May 4, 2014

3 Rules of Machine Quilting

While there are many books, videos and classes about quilting by machine, in truth the only way to learn is to actually do it. I will share with you the three rules of machine quilting, mainly because I need to constantly remind myself!
In the ditch quilting to stabilize it first

# 1: Slow down!
It is not necessary to go as fast as possible. Somewhere is a balance between moving the quilt and the speed of the needle...it's your own combination. Is quilting by machine faster than hand quilting? Yes, but it still takes a long time. And since it's harder to take out "mistakes", I tend make many more assumptions that "nobody will see that!"

# 2: Get your shoulders out of your ears!
Concentrating on the quilting design can cause some tension. Remember to relax. In an ideal world, your arms bent straight out at the elbow would be the height of the machine bed. I hope someone out there can be set up that way, but for most of us the machine is too high. Some day I will get a box to put the foot pedal and my left foot on, so I can pump up my chair to the correct level. Until then, I just have to remember to get my shoulders back down!
And while we're at it, being nearsighted, I tend to hunch over, too! Do you? I have actually had the take-up lever hit my forehead (more than once). My Janome 7700 has an enclosed lever, so that hasn't happened recently.

# 3: Breathe!
A problem caused by concentration or fear, if you are holding your breath your brain is getting starved for oxygen, and nothing good can come of that. 

All three rules could be summed up by saying RELAX.
How easy it is to give that advice to others!
Really, you are doing OK...compare your work to mine (below) and you will see.

INQUIRING MINDS WANT TO KNOW:

What is that quilt are you working on?
This is one of my "Heirloom UFOs" from my mother. I thought it was fabric and some cut out pieces when I took it to a retreat, so I'd be forced to complete it. I was surprized to find it was a finished top with backing! Mom had said this would be for my brother & his wife, and since their oldest son is getting married in June, I asked if they would like me to quilt it for D. & E.
Here's the pattern Mom used:
"Twisted Ribbons" ...and only $2.95!
What's going on in that first picture?
I am stitching in-the-ditch to stabilize the entire quilt, and using the even-feed (walking) foot set up for my machine. Since I'll be doing free motion designs later, this was just along the diagonal lines, but not around every piece. It was not too much work to pivot at each corner.  There is a little hunk of paper safety-pinned where I will start the next line down...it is easy to get confused about where to go back.

What happens when you switch over to free-motion?
I need to put on a darning/quilting foot, and test the thread tension. When I forget the test, I am always sorry. 
This off-set foot really helps me see where I'm going!
I use a scrap of fabric (preferably from the quilt top) and lay it on top of the excess batt & back along one edge of the quilt. Then I'm sure the tension is right for the materials at hand. It's easy to flip the edge over to see the back and make any adjustments before starting in on the real work.

Do you draw the design on the quilt top?
Heck, no! That would double the time it takes, and I am already really bad about time management.
Free motion to fill a background can be like doodling or drawing with the needle. This is HANDMADE, so it's not supposed to be "perfect". 
Just a circle with three "bumps"
Sometimes I mark off an area to quilt inside, but often the piecing defines a section to work in. Guidelines can be helpful for long parts. Use something for marking that can be rinsed or removed, and no one will ever know if you followed a shape right on the line or not!
When I get to the blue fabrics I'll switch threads and just do some simple lines, maybe a flower in the center square.

What happens on the back?
OK, I'm gonna show you...don't say you weren't warned!
Sins revealed?
I chose white thread because I think it's better to match the top, which is more important than the back. So there will be dark blue threads here, too, when I get to the rest of the quilting. It is easy to see where I doubled over, didn't exactly match a line, etc etc etc. This is not going to a judged show, and it will be washed before it's wrapped up... you'd be amazed how the nice texture from washing helps conceal the boo-boos!
Yes, I think  you should do as best work as possible...but also that there can be different criteria for various projects!

I'll be back in a couple days with the rest of this quilt...including the one place where I will draw a special design for the married couple and quilt it in!

Tuesday, April 29, 2014

Paducah 2014: AQS Show and more...

The Acquisitions Dept.
Returning from the big American Quilters Society show in Paducah KY leads to a constant question: What did you buy? So there it is...minus the 5 books from the "hurt book sale" in the Finkel Building! 

The colorful fabric on top is from the Bryerpatch,  soon to be the former studio home of Carol Bryer Fallert-Gentry. She's moving to Port Townsend WA, and the place has been sold to a new quilt  business. It was a pleasure to view Carol's home and special exhibit quilts...and we even met her new husband in the kitchen!

The chicken, moon and tree are embroideries from Tamboni. Please visit the website to learn all about this wonderful mission that not only helps women earn a living but also keeps alive their traditional stories.

The rest is batiks, Cherrywood, and silk fabric gathered from a variety of booths...and, of course, Hancock's of Paducah itself. Shopping in their fabled back room is a must-do when in Quilt City USA. Were the crowds smaller, or was our timing just better this year?

Also missing from the picture are the skeins of lovely perle cotton from Artfabrik. Those are already in my embroidery kit, to be worked into the denim jacket you haven't seen yet! Here's Laura's booth (she's on the left):
Artfabrik = colorful fun!
On NPR the other day I heard about a study concerning money and happiness. They were trying to find out what makes you happier: buying "things"  or buying "experiences".
No surprize that "experiences" made for a longer lasting good feeling, as the thrill of acquiring an item seems to wear off about the time you get it home. Spending money for a meal with friends or taking a vacation provides lasting memories that are enjoyed over and over. And you can increase that pleasure with buying a trip ahead of time to experience the anticipation!
I think I got the most from my dollars, not so much from the great stuff I bought, but from spending seven days with two wonderful friends. The memories really are priceless...and I am looking forward to doing it again next year!

The PIE may be gone, but the memories live on!

Monday, March 17, 2014

8 Half-Square Triangle Units from 2 Squares

Half-Square Triangle units are the basis of many quilt blocks, so it's good to know some different ways to make them. This quick method gives you 8 units at a time!

Here's the formula so you can make the size you need:
Unfinished size of unit + 1/2"  x  2
Cut 2 squares that size..from different fabrics, of course!
Example : for  a 4 x 4 units 12" block (finished) you need 3½" unfinished units (includes the seam allowance)
3½" + ½" = 4" x 2 = 8" squares to cut to get 8 HST units.


On the lighter square, draw a big X from corner to corner:
Use a pencil (not pen) and make a line you can see. This will be a cutting line later.

With Right Sides together, sew 1/4" away from both sides of both lines:
Stitched in red thread for visibility!

Cut right through the middle of the block, but do not move any pieces!
Be sure the fabric is under the ruler...edge of ruler through middle of the X....line up across any marks at the bottom.
This is just cutting, not using marks to measure anything.

Cut through the middle going the other direction:
Working at the corner of the table, you can just move to the other side.

In case you want a better visual, you just cut where the green lines are in this pic...but don't bother to draw them, just use your ruler to cut....
After these two long cuts, it's OK to move the pieces.

Now you can cut on the lines you drew:
Now it looks like the usual set up for quick-piecing HSTs

Press the units open (usually toward the darker fabric).

They should be the correct size. If not, trim them to equal the size you need.


That was fast and easy...with minimal math, all the units can be used, and the bias edges are never on the outside.

If you have some pre-cut squares, do Reversed Math (divide by 2, then minus 1/2" for the unfinished size...minus another 1/2" for the finished unit size)
5" squares = 1½"  (2½ -½" = 2" unfinished size,  for 1½" sewn in)  tiny!!!
10" squares = 4½"  ( 5" - ½" = 4 ½"  unfinished, 4" sewn in)  another 12" block standard

OK, that's more "math" than I can take in one day. 
And to you Math Majors... I do acknowledge this is actually arithmetic! (Vocabulary I know...numbers, not so much!)

Another disclaimer: (Oh, I know there are a few sharp-eyed readers...)
the demo block squares were cut 12", leaving a rather odd size of 5½" units, but this was created for a large group demo and needed to be seen from afar!


Sunday, March 16, 2014

Fast Batik Clipboard Cover


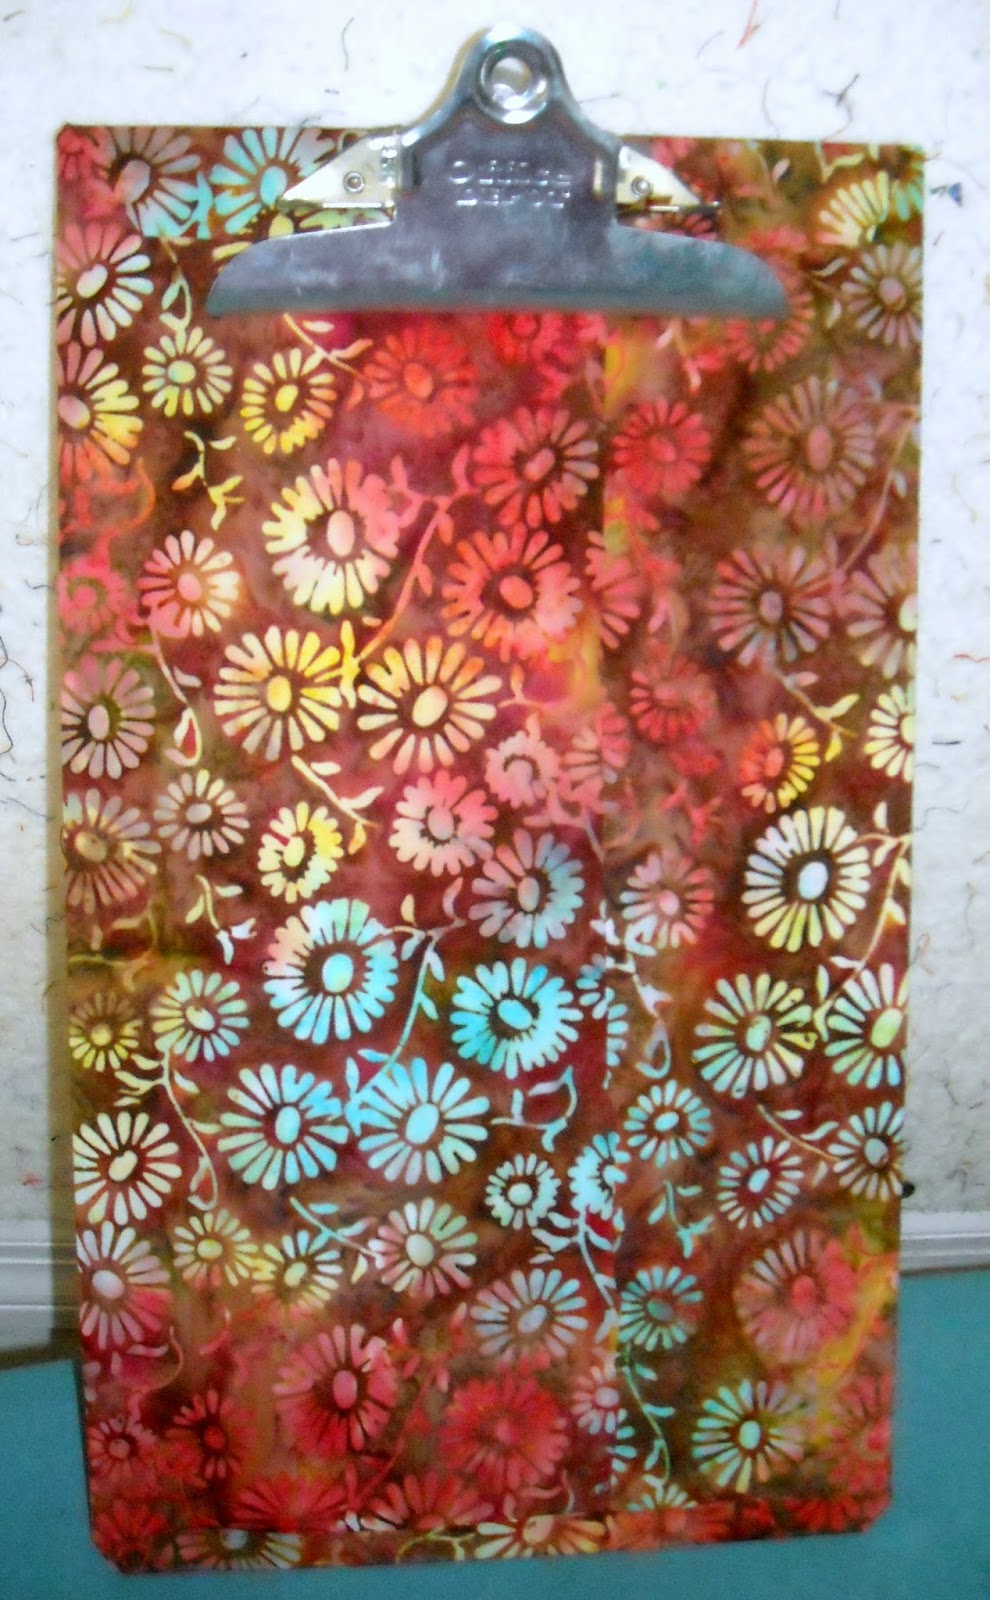
It's perfectly fine to use notes while presenting a quilt guild program, but it's even better to have those notes on a pretty clipboard. Here's a tutorial for making a fast cover. It took me less than 30 minutes. You can use any size clipboard for this.

SUPPLIES
Non-plastic clipboard
Fat quarter-ish piece of fabric 
1/2 yard Wonder Under or other paper-backed fusible web
Iron
Scissors

PREP the FABRIC 
Lay the clipboard on the fabric. There should be enough to fold the sides over to meet in the center (top to bottom) and an inch extra beyond the top and bottom. Check for direction of print, if you care!
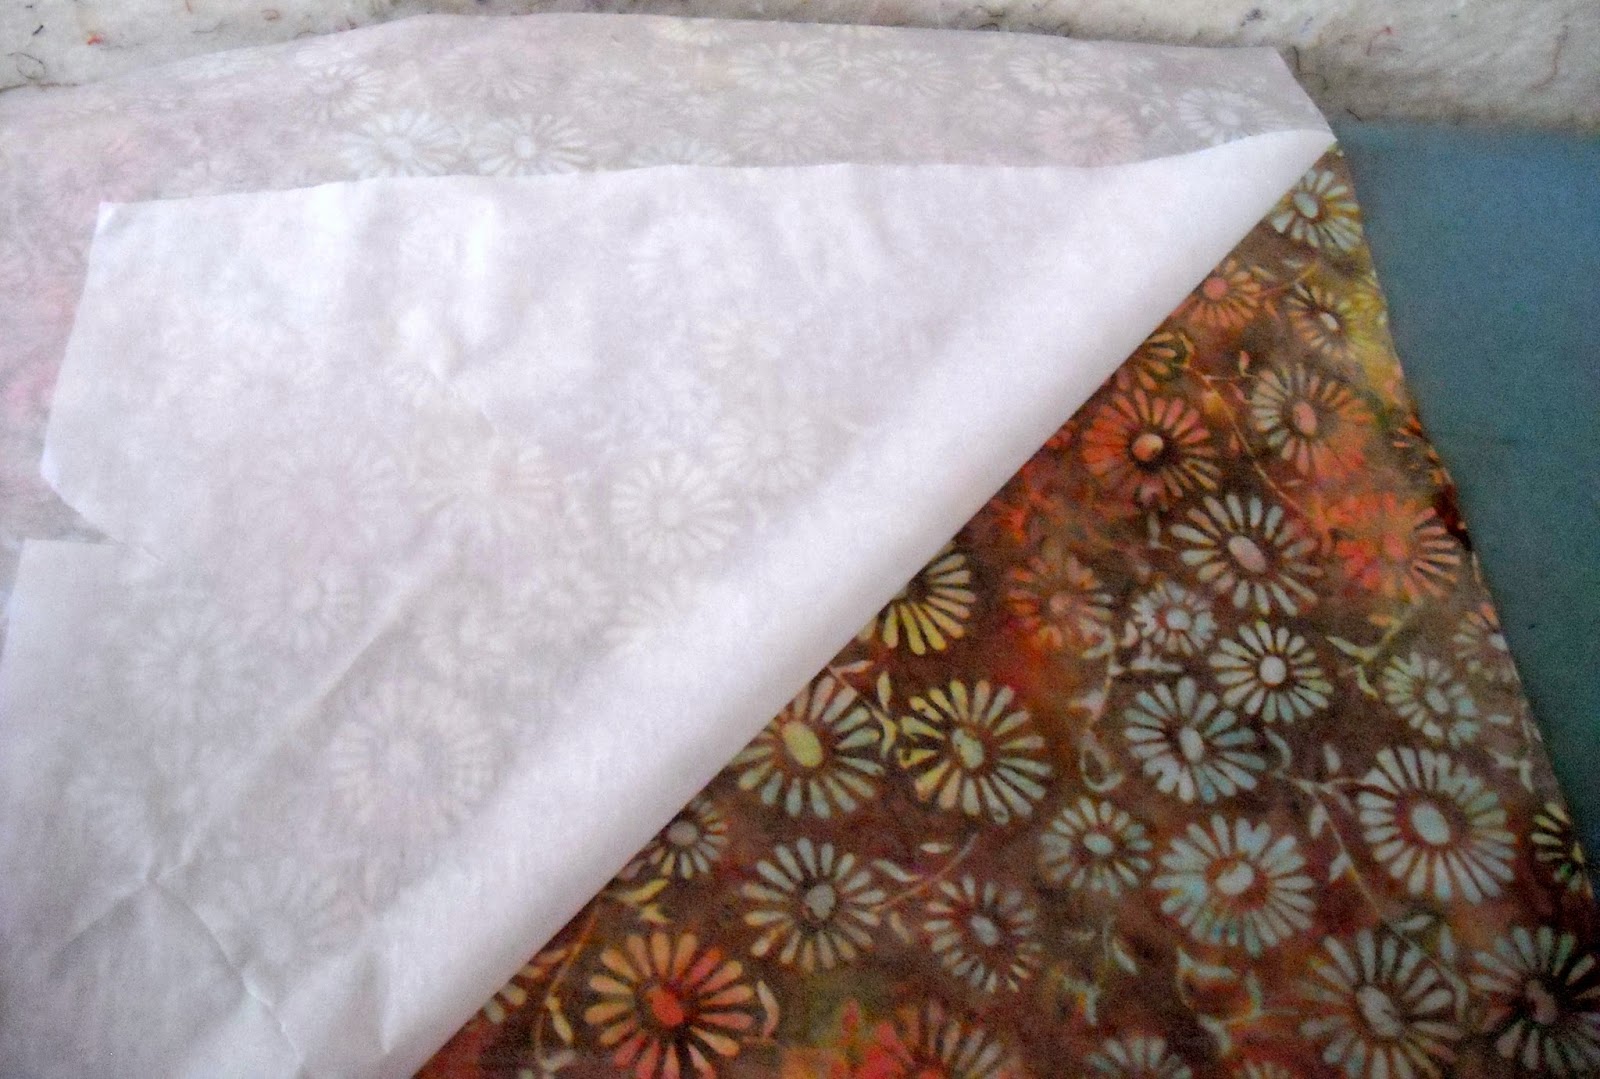
Protect your ironing board with a piece of "release paper"...either parchment paper or paper removed from a previous WonderUnder project.
Iron the fusible to the wrong side of the fabric. I just covered the entire fat quarter, because I will use the small part I trim off in another project. And I cut the Wonder Under by just laying the fabric on it...no numbers for me unless absolutely necessary!
You could use a rotary cutter, but you'll still need scissors later!
Trim any fabric that is not fused and any fusible not on the fabric.

Save this paper and see the bottom of this post for some ways to use it again.
Remove the paper after it has cooled off. Save this paper to use for protecting your ironing board with other projects...and later on for this one! It is treated with silicone so both sides are good to go. It is handy for lots of things, and lasts through several pressings. 


COVER the CLIPBOARD


Wrapping to the front
Lay the clipboard on the fused side of the fabric and wrap the sides to the front.


Fold & slide!
Fold back any extra fabric, slide your scissors in and trim. The edges of the fabric can touch or barely overlap. This side will be covered with papers most of the time, and the print will also "disguise" any wobbles. Please feel free to be as precise as you like for any of this...I'm just getting it done!
Stick your scissors between the front and back layers at each corner and snip up to the board.

Paper is between front and back fabric layers, sticking out at snipped corners
Turn the clipboard over, put a piece of release paper between the layers and fuse the fabric to back of the clipboard.
Trim the sides even with the ends
Flip it over to the front again, and with the sides opened flat, trim out a piece at each corner to make the sides even with the top and bottom.
Fuse the fronts down BUT not all the way up to the clip!
Cut the bottom corners at a slight angle, then turn that edge up and fuse it in place.

Don't worry about this...trim it off!
Trim anything that sticks out. My clipboard has curved corners, so it won't make a sharp angle.


Snip and fold as best you can
The tricky bit: Snip and fold to work the fabric around the clip. I snipped down at each side of the metal, then held the clip open and trimmed across the bottom. I could have used a helper to hold the clip open, but sometimes you just gotta do it on your own!
Put the release paper on top of the back fabric, hold the clip open, and finish fusing under and around the clip. 
Trim the back first
Angle trim the corners of the back layer like you did at the bottom, and trim out the fabric behind the back clip part that sticks up (if you have a board like this).
Turn the back fabric to the front and fuse in place. You are done!
Nobody is perfect!
OK, full disclosure...my trimming was not perfect! So I took a little piece of trimmed off fabric and just fused it right over this spot. If you feel the need to cover up any board parts that show through you could also fill them in with a permanent pen. The fused fabric just tends to blend in....especially if you do not point out where you did it!
TA-DAH!
Well, my friends, I now have two lovely covered clipboards and you have a tutorial! (the original one is on my Facebook page).
There is iron-on vinyl that could be used for a nice finish, or one of the fabric protection sprays. I probably won't bother with those, but you may want to keep the clipboard looking really nice if it will be used often.
Or just cover it again if it gets dirty!


I am doing a lot with fusible web right now. If you'd like some more tutorials and ideas for no-or-low sewing projects, check out Laura Wasilowsi at Artfabrik or Frieda Anderson's website.  You can see them on YouTube...just type a name in the search box. Melodie Johnson's blog also has some good tutorials listed in the side bar.

Have fun and let me know what you've been making lately!