Saturday, December 11, 2010

Catnip Bags for Quilters' Cats


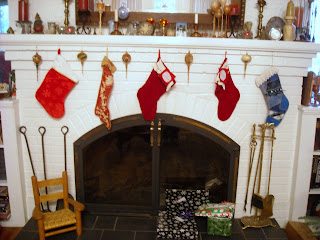
The stockings have been hung by the chimney with care, but somebody is going to have to fill them.....you-know-who!
Whether it's you or Santa, don't forget some treats for the most important person in the house. Yes, I mean your cat! At least that's the way they see it.
Chances are you also have friends who own (or are owned by) a cat...or three, or four....so it's time to do some production style sewing. It's faster and easier to make several Catnip Bags at one time.
Look through your scraps and find some you can cut into squares about 4" x 4". Do not worry about anything being exact! We are making something that will be chewed on, for heaven's sake!
I like to use batiks because 1) they are firmly woven and 2) I have a ton of them! Can't stand to throw out a tiny scrap. And I enjoy seeing those batiks scattered around the house as they get carried and tossed all over the place.
 There's nothing like finding some "pre-sewn" patchwork, or in other words, extra pieces left over from a quilt. The additional benefit is that you do not need to think about the size...it's whatever those HST units are.
Just find a larger scrap for the other side, then sew around the smaller piece using a small stitch (I had my machine on 2.0). 
Right sides together, of course.
 Who cares what the seam allownace is? Make it different on each side if you want! Use any part of the foot to judge, as long as you are inside the fabric.
The tricky bit with anything like this (pincushions, pillows, etc) is remembering to leave an opening. I often do it right away so I don't forget, but today I managed to make four bags that all had openings on the last side sewn!
On one side, sew for a little bit, then backstitch.
Lift up the presser foot and pull the bag along about 2", then put the foot back down, backstitch,  and then continue until you get back where you started.
 If you want to chop off the excess you can...and I do mean chop! Nobody will see the inside!
Note that there looks like a little flap up at the top...I leave the extra fabric there at the opening so it will tuck inside easily when the bag is turned right side out.
Which is what you need to do now.
If you suddenly realize you sewed the pieces right sides out, don't worry about it! Go on to the next step, and when you're done trim, the seam allowances with pinking shears...it will look like you meant to do it that way!
 I rolled up a piece of scrap paper to make a funnel for pouring the catnip into the bag.
Don't fill it completely. A couple tablespoons will do...or, as I had two small bags of catnip, I put half into each of the bags I made. Don't measure! Just do it!

Tuck the opening's seam allowance to the inside and top stitch it closed.
You can stitch all around the bag if you like.
This is about as fast as anything you can make!
Put the catnip bags into ziplock bags until it's time to give the gift!

I think these would be great items for a boutique at a quilt show. Even if you don't personally care for cats, how many quilters do you know who have cats? Point made!
With a bit more time you could actaully do a mouse or fish shape for cuteness. But I do like the patchwork look...this would be a good time to make some string pieced fabric.
Just remember to set your machine for a smaller stitch length!

Shayla O'Puss has already received her catnip bags, so Santa will be bringing her some of those plastic cage balls with bells in them!
The bags in this post are for a couple of cat friends at other quilters' houses.

Coming soon: a Challenge FAIL, fabric postcards tutorial, and more Florida quilt shops
Friday, December 3, 2010

Holiday UFOs: The Next Generation

Quilters' busy lives just kick into full gear this time of year.
So with all the shopping, planning, mailing, traveling (etc!), of course I figured this would be the perfect time to finish up some UFOs.
Not my own, but ones from my mother. She passed away seven years ago, and it's time now to let go of a lot of her things that I've held on to. SO...these are not just UFOs, they are second generation UFOs!

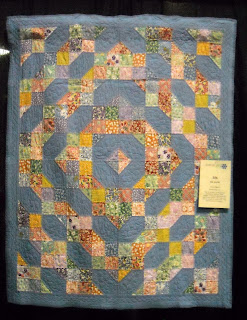
This is the one I finished today. It's not too bad in the picture, but I am here to tell you The Really Awful Truth About Other People's UFOs:
There is usually a good reason they were not finished! 
Could be that time ran out, but more often it is that the piecing was not going well and there are just too many "boo-boos" to ignore.

Mom's holiday UFOs were not her best work, and she was a casual sort of machine quilter (but did lovely handwork), so I decided to keep right in that vein of things and not treat these table runners and quick projects as overly precious. The point was to get them done and given away!
I started at the guild's retreat in November, and worked my way through most of the small pieces.
Today's project was this Karen Combs class piece. Oh, yeah...it was obvious why it had not been turned into anything but a big block with a crooked border!
I persevered, especially with my "don't obsess, just sew" attitude and chose to do an all-machine binding.
Here's how:
 Make a binding and sew it on, mitering the corners as usual but sew in on the back!
After that, I went all around folding the binding up (to the outside) and creasing it.
Then I turned the quilt over to the right side and started wrapping the binding to the front, top stitching as I went.
 The white thread there is from sewing the binding on the back side. The idea is to make the folded edge of the binding cover up that stitching.
I matched the thread to the binding fabric, and sewed very close to the folded edge. But whenever you are topstitching, you can always consider using a contrasting thread...maybe gold?..and possibly a fancy stitch pattern!.
To complete the mitered corners, stop sewing when you reach the binding seam (the white thread here). Backstitch, trim the threads, turn the quilt and fold the next side's binding in place. Start sewing at the corner. 
When you get back around to where you started, finish the ends with the method you like.
 Here we are on the back of the quilt, and the white stitching is the bobbin thread from sewing down the binding on the front. Yes, it shows...this is a utility style of binding, but it's quick, gets the job done, is really sturdy, and most people are not going to care about the back. It doesn't look too bad (but it will NOT win you any points at a judged quilt show!).

As I say, it's important to know what quilt you are making: An heirloom? A show entry? A utility quilt? Something just for fun? etc etc! Each one requires a different level of time and skill.
I still have a few more of Mom's UFOs to complete. Some of them are bound to be heirlooms for family members. Those will take longer.
But the fun ones she would have made quickly to give away...those I will do in the same way she would have done them!

Tuesday, November 2, 2010

Stitchin' Sisters have a Mystery Quilt

The Stitchin' Sisters meet at the Methodist Church in Yulee FL.
They have been learning how to sew and making quilts for several years now, under the leadership of Julie Mainor. Each Tuesday they are at the church making a variety of patterns for gifts, charities, and even occaisionally themselves!
I was honored to be their first "outside" teacher, and provider of their first Mystery Quilt!
We had a wonderful time making The Stadium Quilt, a small quilt designed to be taken to a sporting event.
Of course at the end of the class everyone gets a picture of the quilt to add to their Clues (the instructions broken up by steps).
I like to design these Mystery Quilts with some techniques to learn. The Stitchin' Sisters have a lot of beginners, so they learned about making triangles: Quarter-square triangles, and two different ways to make Half-square triangles!
Usually these days quilters make HSTs with squares cut 7/8" or 1" larger than the finished size, or they use the printed paper for triangles.
This is the first way I learned about making lots of HSTs....on a grid....because you always seem to need a batch!
On the wrong side of the lighter fabric, draw a grid of squares the desired size (choice of formula above) with one diagonal line through each square. Layer it right sides together with a dark fabric. Sew 1/4" away from each side of the diagonal line. Cut on the drawn lines, press open, and, as in the photo above, you get 24 HST units (from a 3 x 4 grid)!

The best part of class is seeing all the different fabric choices. There were lots of the expected sports teams, especially the local college teams...but not one Jaguars! There were even some out-of-state teams. You can get a printed fabric for just about anyone's favorite team, which makes this sort of quilt a great gift.
There were also some lovely quilts made with fish fabrics, flowers and just pretty colors. One lady had fabric she'd saved for over 15 years!
See...it pays to buy it when you see it, even if you don't use it right away!

The Stitchin' Sisters had a covered dish lunch that was unbelieveable! Those ladies sure can cook, and there was so much food they called their husbands to come over an eat with us. I think a few of those guys were waiting for the call!
I should have taken a picture for you, but I was too busy filling my plate with the best fried chicken ever.
Fabric...food...fun...the Stitchin' Sisters have it all! What a great day it was, and I heard since then that most of the quilts are finished!

I showed my two samples, which were quilted onto fleece that was printed in a team motif. If you do that, you can have a double sided statement of your team spirit! (or any of the other zillions of motifs available...really, have you looked at what all is printed on that fleece stuff?)
When you use the fleece, it can be both back & batting, which makes a light weight quilt that can be moved easily through the machine while quilting. I did all-by-machine bindings on those....trust me, you don't want to hand stitch on that fleece!
Sounds like a good idea for a future tutorial!

Sunday, October 31, 2010

Happy Halloween & Happy Birthday!


It's hard to believe that Patchwork Pie is 3 years old!
Starting this blog was a Halloween gift to myself. I was scared to do it, but I have enjoyed sharing with everyone ....and will continue to do so! There has so much happening that I'm quite behind. I've got classes to tell you about, and shops to show (including a new one in my neighborhood!). Then next Sunday it's time to go on a quilters' retreat!
So just for today, I'd like to share this great retro-look fabric from Marcus Bros.
Don't you think it would make a fabulous set of fabric postcards? Maybe if I start them now, I'll have them done by next Halloween!
I'd like to truly thank my Followers and other Faithful Readers for enjoying a piece of the Pie with me. There are some new adventures ahead, and I'm glad to know I'll have you along for the ride!

Thursday, October 21, 2010

Stripping for a Wedding (Blanket, that is!)

When my son and wife-to-be decided on a Native American wedding ceremony, to be conducted by a good friend who is an Iroquois medicine woman, they needed a white blanket.
So of course when your son asks for something special, it doesn't matter what else is on the schedule...I said I would make it! But there wasn't time to make a real quilt, so I fell back on 2 grand traditions: Strip piecing and "Summer spreads" (like a quilt but no batting layer).


First I collected all my white fabrics, which is hard because I generally do not use white. Then I asked all my friends for fabric, and finally I was "forced" to go fabric shopping!
After that, I randomly cut strips between 1.5" and 3" in width. The idea was to make something all white...but still show a lot of texture with the seams and slight differences among the whites.
For the foundations, I used pages from the Sunday newspaper sales flyers! It's lightweight and tears away easily. I cut them into 10.5" squares, as that is the largest size I could get from the most flyers.
Each square starts with a strip going diagonally, right side up.
Then lay another strip on top, with the right sides facing, and sew all the way to the end of the paper.
Don't bother to measure anything...just cut off the extra length.

Some of the short ends can be sewn into pairs, which are handy for filling up the paper foundation out near the corner...the seams get short there. I sewed a couple of short sets in between the full squares to keep that chain going!
 I did take the time to press the strips open, so there would not be any surprise tucks in the seams. But I only did it after I had 2 strips to press...one on each side of the center.
 Now it's time to trim!
Strip or string piecing is a wonderful way to use up scraps...and I must admit it bugged me to be "wasting" so much fabric that I bought just for this project!
Trim to the edge of the paper foundation, if you cut it a certain size. There is enough excess fabric here that I could have cut the blocks a bit larger, if I had wanted. Like maybe adding a forgotten seam allowance?

 Love that blue painters tape...it doesn't leave any residue on the ruler or fabric or whatever.
I trimmed the top and right side, using the ruler's edge, then turned the block around to finish the other two sides. The tape is marking where to line up the trimmed corner before making the second cut.
 All trimmed up and ready to go! Some of the fabrics had a shine, and I tried to get at least one of those in each block.
The paper comes off fairly easily if you fold it back and crease it before tearing.
And it helps a lot if you remember to sew all the strips with a shorter stitch!
The blocks are sewn together as with any quilt blocks. The seams are not intended to be matched...in fact, I don't think they could be!
All the seams can be set to run the same direction, or they can be set to alternate, which looks like an X or a diamond.

This is techincally not a quilt, as it has only two layers. The backing is white, and I just stitched "in the ditch" around each block to keep the thing from puffing up like a big marshmellow!
And beacuse it was to be part of the Blanket Ceremony, I finished the edge with a white satin blanket binding. 

It was hard to make something all white....I am a color-lover! Bright colors! Bold prints!
But I'm pleased with this, even if it is a lot more subtle than my usual work. 

Here's the happy couple with the blanket symbolizing their union. May they have a long and happy future together!
The white blanket's future is unknown at this time.
It might just stay as it is. Or I might take it apart and use it as a background for some appliques, and then quilt it with colorful thread!

Only time will tell.

Friday, October 15, 2010

Water Equals Life

What does water have to do with a quilt or a quilter?
Everything...because without water we would have nothing.
No cotton plants could grow, the cotton couldn't get to market, it couldn't be dyed.
Even more, the people who grow the cotton could not live without water, nor could quilters live without water...it is the most basic of human needs.

Quilts can help us understand what water means. Hollis Chatleain's "Precious Water", a Best of Show at the IQA in Houston, is all about how every living thing depends on water.

How much water did you use today?
Did you wash your hands...brush your teeth...do laundry...take a drink...you know you flushed at least once!
Each time you turned on the tap you probably used half a gallon to several gallons of water.
Washing a quilt takes maybe 20 gallons.
All that water was clean and safe to drink, even if it never got close to your mouth.
Just one gallon of water weighs over 8 pounds.
So... what if  you had to walk several miles to the only place to get any water...and that water was not clean, and when you and your family used it, you all might become sick? And you had to spend hours carrying water every day, because even unsafe water is better than none?
More than a billion people around the world do not have clean water. More than 2.1 million people  (mostly children) die each year from diseases found in water. Even in our own country.

October 15 is Blog Action Day, and this year's topic is clean, safe water.
I signed up to tell you these things about water, because it's something we all depend upon, and yet mostly take for granted.
Until we can't get it...the plumbing is broken, the electric is off and the pump doesn't run. Think about a time you weren't able to get water in your own house, how upset you were!
Remember that time when you next go into the kitchen or bathroom.
Look at the amount of water that just runs down the drain.
Then think about the woman, and her children, who carry just a few gallons of water for all their daily needs. And still run the risk of becoming ill from bad water.

Clean safe water is the most basic of human needs. Providing that to everyone is the most basic of ways one person can help another.
You can help through many organizations. Church World Service is one.

Thank-you for letting me get off-topic today. I know that quilters are people who care about others, and knowing about a problem is the first step towards improving a situation.

ADDED NOTE: What good is a plea for funds unless we state what the money is for? CWS, and many other fine agencies, help villages drill wells so people can get that safe clean water in a nearby location. What else could truly help each person and improve so many lives?

Coming next: Stripping for a Wedding!

Thursday, September 30, 2010

All Star Quilts, Part II

What a great show in the previous post!
Again, I am trying to get all the designers & patterns credited, so please let me know when I can add any info to a post...or if you would like me to remove a photo, I will happily honor your wishes immediately.

The theme of this year's QuiltFest was "Birds of a Feather Quilt Together", so let's start off by looking at a few of the Challenge pieces!
 Melinda R. takes us to the battle for "Featherweight Champion". She used yellow netting and beading to create that wonderful spotlight effect.

Pat P. has put the challenge fabrics to good use with her "Birds of A Feather Challenge". A 3-D touch is always nice!

"Feathered Friends" have gone for a day at the beach in Karen W.'s shaped and embellished quilt.
It's always fun to see what inspirations come from a theme and a little bunch of fabric.
Next year is "The Sky's The Limit"!
Now on to rest of the entries from the All Star Quilters Guild...

"Aurora" came from a collection of fabrics Dot B. received for Christmas one year. It can be fun...and challenging!...to work with selections from another person.

Trish E. calls this one "Big Sister", because she also has... 
"Little Sister" made from the leftovers! What a great idea for using up scraps and extra units!

Speaking of projects that come as pairs, here is "His" by Margaret S. It's sort of the pieced, masculine version of ... 
 ..."Hers" found in the Applique category. These came from two Block of the Month programs (honest, I am getting the info!). These were designed as companion quilts, Classic Folk Art (2004) by Designing Friends (Vicki McGowen and Kathy Johnson).

 OK, Pat P....your quilt just insists on staying on this side no matter what I try! "Old Fashioned Holiday" is a lovely use of crochet doilies as half-square triangles. She must have been feeling "in the pink"....
with this "Spring Blossoms" quilt from the Other Applique Techniques category.

Karol B. cleverly titled this quilt "Transpositions" for it's musical themed fabrics. Or maybe it was because she got the pattern reversed? Debbie Bowles' "BQ2" looks great no matter how you make it!
The guild had fun learning this pattern in a class taught by Lynn Provencher of Country Crossroads Quilt Shop. Here's another example from the same class...
Andrea P. used some pieced blocks instead of the plain squares for "Tropical Triangles Encore".
Could these be left over from a previous project??? 

Cathy J. takes us on trip to the Southwest with "Kokopelli Seranade". Take a closer look at the beadwork: 
 Nicely done! The beads are the pefect size and colors and add just the right touch.

Sometimes you just can't get a photo without ardent admirers in the way! Sandy O.'s "Winners Bouquet" is well worth a good look! Sandy actually flew in to Jacksonville just for the show. Maybe next year she'll let her husband come along!

I am fairly sure this is Karla P.'s "Paisley Park", but honestly, keeping track of all the beautiful quilts just makes my head swirl! This quilt has a great balance of values and colors.

Pat D. used a packet of fabrics donated to the guild by Magrieta's Quilt Shop to create "Elegance". Black and taupe is a beautiful combination.

With a nod to her heritage, Val S. made "Hawaii's Star" with a terrific bold floral. I really like a smaller quilt that looks like a "blown up" block. You could try your favorite block this way!

"It's All About Lisa" in Mary Anne D.'s photo quilt. Two things make this one a real standout: the photo transfers have good, deep color, and Mary Anne went to a lot of trouble to put little black triangle corners on each picture for an old album effect. Those details really do make a difference!
Then she had a small amount of a special fabric, resulting in... 
"Space Sprouts in My Potato Chips", which refers to the style of blocks (see Gay M.'s quilt above). The print motif does look like a sprout...perhaps from another planet!

Last, but not least, is Mary Jo K.'s "Ruby Diamond"...and what a little hand-pieced gem it is! Don't you love that the tag is actually larger than the quilt?

This completes our All Star show for 2010. It is so exciting to see all these quilts hanging proudly in QuiltFest. Competion is fun for some people, but a show needs lots of entries and they can't all have a ribbon. You know, they really don't need a ribbon...showing and sharing with other quilters, and helping the public to learn to love quilts, that's the real reward!

Wednesday, September 29, 2010

All Star Quilts (Part I)

The  Really Big Show...QuiltFest...has come and gone again. It was bigger and better than ever, with 430 quilts this year.
The set up and take down are about the same every year, so I thought this time I'd like to make a couple posts to feature the entries by my guild sisters, The All Star Quilters Guild.
The name does not refer to any membership requirement...we have people from beginners to major award winners and even several teachers. There are members of all ages and both sexes. Everyone is welcome...even a few people who don't make quilts, they just enjoy being with quilters!
We like to say "All Stars...where everyone can shine!"
If anyone wants their name or photo removed, I will do that...and if anyone can tell me the correct designer's name, I will be glad to add that right away!
This is our raffle quilt, "Morning Star". It was made from a commercial pattern, and I am appalled to say I don't have that info! It's on the label, though, and I will add it here ASAP! (Quilt Moments by Marilyn Foreman...pattern name "Celebration"...but the colors were completely changed for this quilt).
All seven guilds who work togther putting on this show have raffle quilt drawings on last day. This one was won by long-time member Dorothy J. (sorry Quilt Mother Margaret S.!).

Here's a quilt that came all the way from Panama. It gets counted as an All Star quilt because it was made by a member's friend, Carol S.
This is a Mary Lou Weidman design.

 Carol G. had two quilts in the show. This one is "Grandmother of Invention"....
.....and this one is "Celestial Dreams". Don't you love the way two blocks work together? Carol got this pattern from Marcia Hahn's Quilters Cache website.

 Kathy R.made Judy Niemeyer's pattern and called it "Thistlepods on the Green". The photo does not show how pretty the purple and green colors are.
Kathy also made this one:
 It's a One Block Wonder style called "Little Red Corvette Goes for a Spin" and is a marvelous use of that kaleidoscope technique plus a super-cute fabric!

 Gay M. loves to make a bargello quilt, and this one,"John's Surf Song", was done for her son. The pattern came from "Twist & Turn Bargello" by Eileen Wright. She also made a quilt in another of her signature styles....
 "Flowers Everywhere" is a fantastic use of two reverse-value prints (same pictures, dark & lights switched) in a "Potato Chip Quilt". That's a quick technique, and of course, you can't "make just one".

 Shirley S. shows how to let the fabric work with"Shoji Screen". Some fabrics are too beautiful to chop up!
She also made this unique quilt...
"Wedding Ring" has bright red pieces where the rings join, and is quilted with red thread. The black & white prints almost blend into the background...it's a beautiful way to give a new look to an old pattern!
Shirley had this entry, too...
 "Color Falls" gives us a good lesson in using a variety of colors and values!

 "French Rose" has Miriam B. showing off the rag technique with a good selection of fabrics. This is one that begs to be cuddled up in!

 Pat B. was not afraid of all those curves in "Apple Core II"! She loves to make scrap quilts in bed sizes...and give them to her family members. Hey, Pat...can I be your sister???

 Look close on the left side...Vicki Z.'s blue ribbon blends right into the colorful "Night and Day". The inspiration for this quilt was Cathy Tomm's "Luminous Diamonds" in the July 2009 American Quilters Society magazine.Vicki is a faithful hand quilter...yes, even with all those seams!
So she had to make this one...
...some "Amish Inspiration" for us! Yes, she won two ribbons in this Intermediate Pieced category. We teased her...if only she'd made another, she could have swept the category!
You can't tease someone unless she really deserved those ribbons, and Vicky sure did!

 Lois W. won't see this on my blog because she doesn't use a computer. In fact, she's in assisted living, but managed to get "A Fireman's Friend" done specially to enter into this show. This log cabin settling is a great idea for featuring those "picture prints" of Dalmations.


This is a detail shot of Eleanor A.'s "Civil War Reproduction", which she made from a collection of fabrics she'd had for 15 years. The whole quilt is wonderful, but I wanted to point out the very well-chosen quilting pattern. The fan shapes work so nicely with the geometic squares, and it is the sort of all-over design that would have been used back in the mid-1800s.

I hope you enjoyed this first batch of All Star quilts. There are at least this many more to come, including entries in the Challenge category, "Birds of A Feather Quilt Together", the show's theme for 2010.